Nutty Bliss No-Bake Trail Mix Bars: A Healthy Snack Delight
In recent years, the trend of healthy snacking has surged, with individuals increasingly seeking nutritious options that align with their wellness goals. As people become more conscious of their dietary choices, they are looking for snacks that not only satisfy their cravings but also provide essential nutrients. Enter the Nutty Bliss No-Bake Trail Mix Bars, a delicious and wholesome treat that perfectly fits this mold. These bars are not only easy to whip up but also incorporate a variety of nutritious ingredients that make them a perfect choice for any time of the day.
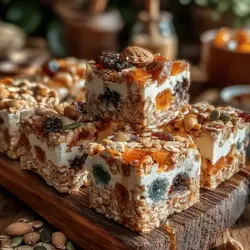
The appeal of Nutty Bliss No-Bake Trail Mix Bars lies in their simplicity and versatility. Made from a blend of rolled oats, nut butter, mixed nuts, seeds, dried fruits, and a touch of sweetness, these bars offer a delightful crunch and energy boost without the need for an oven. Whether you’re looking for a quick breakfast option, an afternoon pick-me-up, or a post-workout snack, these bars are designed to fuel your body and keep you satisfied.
Wholesome ingredients are at the heart of this recipe. Each component contributes not only to the flavor and texture but also to the overall health benefits of the bars. By using natural, nutrient-dense ingredients, you can create a snack that supports your energy levels and promotes overall well-being. The Nutty Bliss No-Bake Trail Mix Bars are a testament to how healthy eating can be both enjoyable and easy.
Understanding No-Bake Bars
No-bake recipes have gained popularity for a variety of reasons, making them a go-to choice for many home cooks and busy individuals alike. Simply put, no-bake bars are snacks that do not require baking in an oven, which saves both time and energy. This method appeals to those who may not have extensive cooking skills or who prefer quick and straightforward recipes.
The benefits of no-bake bars extend beyond just ease of preparation. These treats can often be made in under 30 minutes, allowing you to whip up a batch and have delicious snacks ready for the week ahead. Additionally, no-bake bars are incredibly versatile; you can easily modify the recipe based on personal preferences or dietary restrictions. Whether you’re gluten-free, vegan, or simply looking to reduce sugar intake, no-bake bars can be tailored to fit your needs.
When it comes to the ingredients typically found in no-bake snacks, the options are abundant. Common components include grains like oats, nut butters as a binding agent, and a variety of seeds, nuts, and dried fruits for added texture and flavor. The beauty of these ingredients lies in their nutritional profiles; they are packed with essential nutrients that contribute to a balanced diet.
Ingredients Breakdown
To create Nutty Bliss No-Bake Trail Mix Bars, you will need a selection of wholesome ingredients, each chosen for its health benefits and flavor contribution. Here’s a closer look at what goes into these delicious bars:
– Rolled Oats: A staple in many healthy recipes, rolled oats are rich in dietary fiber, which is essential for heart health and digestion. They provide a hearty base for the bars and contribute to a satisfying texture.
– Nut Butter: Whether you choose almond, peanut, or cashew butter, nut butter serves as a source of healthy fats and protein. It not only helps to bind the ingredients together but also adds creaminess and flavor.
– Honey or Maple Syrup: Natural sweeteners like honey or maple syrup are perfect for adding a touch of sweetness without the refined sugars. They also come with added nutrients, making them a healthier alternative to traditional sweeteners.
– Mixed Nuts: A mix of almonds, walnuts, pecans, and cashews brings a delightful crunch to the bars. Nuts are nutrient-dense, packed with vitamins, minerals, and antioxidants, which are vital for overall health.
– Seeds: Chia seeds, flaxseeds, or pumpkin seeds can be added for an extra boost of protein, fiber, and essential fatty acids. They enhance the nutritional profile of the bars and contribute to their satisfying texture.
– Dried Fruits: Raisins, cranberries, or apricots add natural sweetness and are a great source of vitamins and minerals. They provide a chewy contrast to the crunch of the nuts and seeds.
– Dark Chocolate Chips: For those who enjoy a bit of indulgence, dark chocolate chips can be incorporated for a rich flavor. Dark chocolate is known for its antioxidant properties, so including it in moderation can offer health benefits.
– Vanilla Extract and Sea Salt: A splash of vanilla extract enhances the overall flavor of the bars, while a pinch of sea salt balances the sweetness and brings out the rich taste of the ingredients.
Step-by-Step Instructions
Now that we have a solid understanding of the ingredients that go into the Nutty Bliss No-Bake Trail Mix Bars, let’s delve into the preparation process. The first step in making these bars is to prepare your baking pan properly. It is crucial to line the pan with parchment paper, allowing for easy removal once the bars have set. This simple step ensures that your bars come out neatly and don’t stick to the pan, making for a hassle-free experience.
Next, you will need to combine the dry ingredients. In a large mixing bowl, add the rolled oats, mixed nuts, seeds, and dried fruits. To ensure even distribution of flavors and textures, it’s essential to mix these ingredients thoroughly before adding any wet components. Using a spatula or wooden spoon, gently stir the mixture to ensure that each dry ingredient is well incorporated. This step is vital, as it sets the foundation for the overall taste and mouthfeel of your trail mix bars.
As you prepare to move forward with the recipe, remember that the balance of flavors and textures is key to creating the perfect Nutty Bliss No-Bake Trail Mix Bars. By carefully selecting and combining your ingredients, you’ll be well on your way to crafting a delicious and nutritious snack that is sure to please any palate.
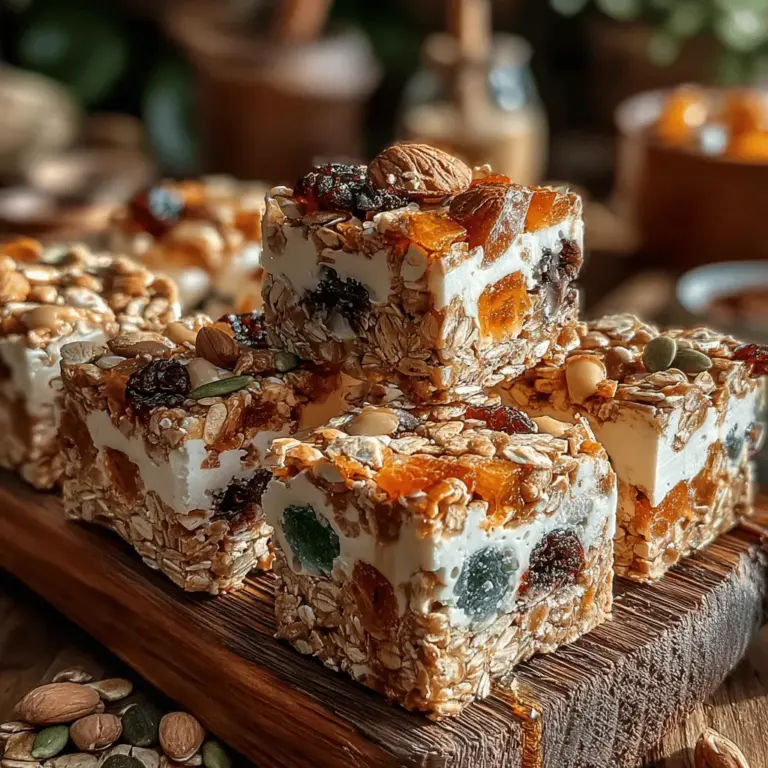
{{image_2}}
Mixing Wet Ingredients
Achieving a smooth consistency with your wet ingredients is crucial for the overall texture of your Nutty Bliss No-Bake Trail Mix Bars. Start by measuring out your nut butter and sweetener (like maple syrup or honey) accurately. For this recipe, choose a creamy nut butter, such as almond or cashew, for easy blending.
To mix effectively, use a microwave-safe bowl and warm the nut butter slightly. This step makes it easier to combine with other wet ingredients, allowing for a smoother blend. If you’re using coconut oil, melt it first before adding it to the nut butter. Combine the nut butter and sweetener using a whisk or a hand mixer to ensure they are fully integrated. This technique will prevent any clumps and ensure that every bar is evenly flavored.
Combining Mixtures
Once your wet ingredients are ready, it’s time to mix them with the dry ingredients. In a separate bowl, combine your rolled oats, chopped nuts, seeds, and any additional mix-ins like shredded coconut or dark chocolate chips. When combining the two mixtures, pour the wet ingredients over the dry ingredients, making sure to scrape every bit from the bowl to ensure no flavor is lost.
Use a spatula or a wooden spoon to fold the ingredients together gently but thoroughly. The goal is to achieve a cohesive mixture where the dry ingredients are well-coated with the wet ones. Avoid overmixing, as this can lead to a dense texture rather than the chewy, satisfying bite you desire.
Transferring to the Pan
Now that you have a well-combined mixture, it’s time to transfer it to a pan. Line an 8×8 inch baking dish with parchment paper, leaving some overhang for easy removal later. Pour the mixture into the lined pan and use your hands or the back of a spatula to firmly press down. Compacting the mixture is essential for ensuring the bars hold their shape once set. A well-packed mixture will prevent crumbling and maintain a nice, uniform texture when you slice the bars.
Chilling and Setting
Cooling is crucial for achieving the right texture in your Nutty Bliss No-Bake Trail Mix Bars. After pressing the mixture into the pan, place it in the refrigerator for at least 2 hours or until firm. This chilling time allows the nut butter to harden and bind the ingredients together, making the bars easier to slice. If you’re short on time, you can place them in the freezer for about 30 minutes, but be sure to keep an eye on them to avoid freezing solid.
Slicing and Storage
Once your bars have set, it’s time to slice them into your desired portions. Use a sharp knife to cut straight through the mixture; for even-sized bars, measure out your cuts beforehand. If you find that the mixture sticks to the knife, you can lightly grease the blade or run it under warm water before cutting.
To maintain freshness, store your Nutty Bliss No-Bake Trail Mix Bars in an airtight container. These bars can last up to a week at room temperature, but for maximum shelf life, keep them refrigerated. You can also freeze them for longer storage, making them a convenient grab-and-go snack whenever you need a quick energy boost.
Nutritional Information
Each serving of Nutty Bliss No-Bake Trail Mix Bars provides a nutritious blend of healthy fats, protein, and fiber, making them an excellent choice for a snack. Here’s a breakdown of the nutritional content per bar:
– Calories: Approximately 180
– Protein: 5g
– Fat: 10g (mostly from nuts and nut butter)
– Carbohydrates: 15g
– Fiber: 3g
– Sugar: 5g (depends on the sweetener used)
Comparison with Store-Bought Snack Bars
Homemade Nutty Bliss No-Bake Trail Mix Bars offer several advantages compared to store-bought options. Many commercial snack bars contain added sugars, preservatives, and artificial ingredients. In contrast, by making these bars at home, you control the ingredients, ensuring they’re wholesome and tailored to your taste preferences. Additionally, you can adjust the sweetness and customize the flavors, making them more enjoyable and satisfying.
Dietary Considerations
These bars can easily accommodate various dietary preferences. They are naturally gluten-free when using certified gluten-free oats, and you can opt for a vegan sweetener like maple syrup to keep them plant-based. If you or someone you’re serving has nut allergies, consider using seeds like sunflower or pumpkin seeds, or even sunflower butter as an alternative to nut butter.
Creative Variations and Customizations
The beauty of Nutty Bliss No-Bake Trail Mix Bars lies in their versatility. Here are some suggestions for ingredient substitutions based on dietary preferences:
– Nut Butters: Experiment with different nut butters such as peanut, hazelnut, or even seed butters like tahini for unique flavor profiles.
– Nuts and Seeds: Incorporate various nuts like walnuts, pecans, or almonds, and consider adding chia seeds or hemp seeds for enhanced nutrition.
– Dried Fruits: Use seasonal dried fruits such as cranberries, apricots, or figs to add natural sweetness and chewiness.
– Flavor Combinations: Spice things up by adding cinnamon, nutmeg, or even a pinch of sea salt to the mixture for a delightful twist.
Presentation Ideas
Presentation can enhance the enjoyment of your Nutty Bliss No-Bake Trail Mix Bars. Here are some tips for making them visually appealing:
– Layered Display: Arrange the bars on a decorative platter or tiered cake stand to create an inviting display.
– Fresh Pairings: Serve the bars alongside fresh fruits like apple slices, banana halves, or a dollop of Greek yogurt for a satisfying snack.
– Gifting Options: Wrap individual bars in parchment paper and tie them with twine for a thoughtful homemade gift for friends and family.
Conclusion
Creating Nutty Bliss No-Bake Trail Mix Bars is not only a simple way to prepare a nutritious snack, but it also allows for creativity in the kitchen. These bars are customizable, allowing you to experiment with different flavors and textures while ensuring you provide wholesome options for yourself and loved ones.
The benefits of making your own trail mix bars at home are numerous; they are healthier, more flavorful, and free from unnecessary preservatives. So dive into this recipe, enjoy the process of healthy snacking, and don’t hesitate to tweak the ingredients to suit your taste. After all, the joy of preparing nutritious, homemade snacks is something to be celebrated!