Introduction
In recent years, the trend of no-bake desserts has surged in popularity among home bakers and dessert enthusiasts alike. With their simplicity, convenience, and minimal preparation time, no-bake treats have become a go-to option for those looking to satisfy their sweet tooth without the hassle of traditional baking. One standout recipe in this category is the No-Bake Chocolate Oat Bars. These bars not only promise a delightful combination of chocolatey goodness and wholesome oats but also offer a healthier alternative to many store-bought snacks.
The No-Bake Chocolate Oat Bars are a perfect blend of taste and nutrition, making them an excellent choice for breakfast on the go, a midday snack, or even a guilt-free dessert. What sets these bars apart is their versatility; you can easily customize the ingredients to suit your dietary preferences or available pantry items. Whether you’re vegan, gluten-free, or simply looking for a quick treat, these bars can be adapted to meet your needs with minimal effort.
Moreover, the ease of preparation is a significant draw for many. With just a few simple ingredients and a quick assembly process, you can whip up a batch of these delicious bars in no time. No need to preheat the oven or deal with messy baking sheets—just mix, press, and chill.
Understanding the Ingredients
Before diving into the preparation, it’s essential to understand the key ingredients that make up these No-Bake Chocolate Oat Bars. Each component not only contributes to the delicious flavor but also packs its own nutritional punch.
Old-Fashioned Rolled Oats
The star ingredient in these bars is old-fashioned rolled oats. They serve as the base, providing a hearty texture and a substantial amount of dietary fiber. Oats are well-known for their health benefits, including cholesterol-lowering properties and the ability to regulate blood sugar levels. They are also a fantastic source of complex carbohydrates, which means they provide sustained energy—perfect for a mid-afternoon pick-me-up or a pre-workout snack.
Almond Butter and Alternatives
Next up is almond butter, which serves as the primary source of healthy fats in this recipe. Almond butter not only adds creaminess but also boosts the protein content of the bars. It’s rich in monounsaturated fats, which are beneficial for heart health. If you have nut allergies or prefer a different flavor, alternatives like sunflower seed butter or peanut butter work equally well in this recipe. Each option brings its own unique taste and nutritional benefits to the table.
Sweetness Factor: Maple Syrup vs. Honey
To sweeten the bars, you have the choice between maple syrup and honey. Both natural sweeteners bring a touch of sweetness without the refined sugars found in many store-bought snacks. Maple syrup is a vegan-friendly option and is rich in antioxidants, while honey offers its own set of health benefits, including antibacterial properties. The choice between the two often comes down to personal preference, but either will lend a delicious flavor to the finished product.
Cocoa Powder
Cocoa powder is another vital ingredient in these chocolate oat bars. Not only does it provide the rich chocolate flavor that makes these bars irresistible, but it also contains antioxidants known as flavonoids, which can help improve heart health and lower blood pressure. When choosing cocoa powder, opt for unsweetened varieties to keep the sugar content in check.
Chocolate Chips and Optional Toppings
Finally, no chocolate treat would be complete without chocolate chips. These can be mixed into the oat mixture for an extra burst of chocolatey flavor or sprinkled on top for added texture and visual appeal. You can use dark chocolate chips for a richer taste or even dairy-free chips for a vegan option. Additionally, you can customize your bars with optional toppings like shredded coconut, chopped nuts, or seeds for added crunch and nutrition.
Step-by-Step Instructions
Now that we’ve established the importance of each ingredient, let’s walk through the step-by-step process of making No-Bake Chocolate Oat Bars.
Preparing the Pan
Start by preparing your pan for the bars. Line an 8×8-inch square baking dish with parchment paper, leaving some overhang on the sides. This will make it easier to lift the bars out once they have set. Lightly grease the parchment paper with cooking spray or a bit of coconut oil to ensure that the bars do not stick.
Blending the Dry Ingredients
In a large mixing bowl, combine the old-fashioned rolled oats, cocoa powder, and any additional dry ingredients you may want to include, such as protein powder or cinnamon. Stir these ingredients together until they are evenly mixed. This step is crucial for ensuring that each bar has a consistent flavor and texture.
Combining Wet Ingredients
In a separate bowl, mix together the almond butter and your choice of maple syrup or honey. If the almond butter is too thick, you can microwave it for a few seconds to soften it, making it easier to mix. Whisk the wet ingredients until smooth and well-blended.
Mixing Wet and Dry Ingredients
Now it’s time to combine the wet and dry mixtures. Pour the wet mixture into the bowl with the dry ingredients and stir until everything is well combined. You want to achieve a thick, sticky consistency that holds together when pressed. If the mixture feels too dry, add a splash of water or additional sweetener until it reaches the desired texture.
Folding in Chocolate Chips
Once your mixture is combined, gently fold in the chocolate chips. This step ensures that every bite of your No-Bake Chocolate Oat Bars is packed with rich chocolate flavor. If you’re feeling adventurous, consider adding other mix-ins like chopped nuts, seeds, or dried fruit for added texture and nutrients.
Pressing the Mixture into the Pan
Transfer the mixture into the prepared baking dish. Using a spatula or your hands, press the mixture down firmly and evenly into the pan. It’s important to compact the mixture well to ensure that the bars hold their shape once set. You can use the bottom of a measuring cup to create an even surface, making the bars easier to cut later.
Now that you’ve completed these initial steps, it’s time to let the bars chill in the refrigerator. Allow them to set for at least one hour to firm up before cutting them into squares or rectangles. This no-bake recipe is not only straightforward but also results in a delectable treat that you can feel good about enjoying. Stay tuned for the next part of the article, where we’ll explore some creative variations and serving suggestions for your No-Bake Chocolate Oat Bars.
{{image_2}}
Refrigerating for Optimal Texture and Firmness
Once you have mixed your ingredients and pressed them into your prepared pan, the next crucial step is to refrigerate the mixture to achieve the perfect texture. Place the pan in the refrigerator and allow the bars to chill for at least 1 to 2 hours. This cooling period not only helps the bars to firm up but also allows the flavors to meld together beautifully, resulting in a richer taste. If you’re in a hurry, a 30-minute chill will suffice, but for the best outcome, patience is key. After chilling, the bars should be firm enough to hold their shape when cut, creating a delightful chewy yet crunchy texture that is simply irresistible.
Cutting and Serving Suggestions for Presentation
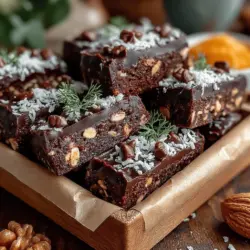
Once your no-bake chocolate oat bars are ready, it’s time to cut and serve them. Carefully remove the bars from the pan using the parchment paper overhang, making it easy to lift out the whole batch. Place them on a cutting board and use a sharp knife to slice them into your desired size—typically, 16 squares works well for a snack-sized treat.
For an elegant presentation, consider drizzling a little extra melted chocolate on top of the bars or sprinkling them with a dusting of cocoa powder. You can also add a few chocolate chips or chopped nuts on top for an appealing finish. Serve them on a decorative platter or in individual snack bags for a grab-and-go option. These bars are not just a treat; they can also be a centerpiece at gatherings, showcasing a wholesome yet indulgent dessert.
Storage Tips to Maintain Freshness
To keep your no-bake chocolate oat bars fresh, store them in an airtight container. If you live in a warm climate, it’s best to keep them in the refrigerator to prevent melting and maintain their texture. These bars can last up to a week in the fridge. For longer storage, consider freezing them. Wrap each bar individually in plastic wrap or parchment paper and store them in a freezer-safe container. They can be frozen for up to three months. When you’re ready to enjoy, simply thaw them in the refrigerator overnight or at room temperature for a couple of hours.
Benefits of No-Bake Chocolate Oat Bars
Healthier Alternative to Traditional Chocolate Bars
One of the most significant advantages of making no-bake chocolate oat bars is that they serve as a healthier alternative to store-bought chocolate bars. Unlike commercial snacks that are often packed with preservatives, artificial ingredients, and added sugars, these homemade bars allow you to control the quality and quantity of ingredients. By using whole oats, natural nut butter, and a touch of sweetener, you create a snack that is both satisfying and nutritious.
Quick Prep Time and Minimal Cooking Effort
Another appealing aspect of this recipe is the quick prep time. With just a few simple steps, you can whip up a batch of these bars in under 20 minutes. There’s no need for baking or complicated techniques, making it accessible even for novice cooks. The minimal effort required means you can enjoy a delicious homemade treat without spending hours in the kitchen.
Customizable Options for Dietary Preferences
These no-bake bars are incredibly versatile and can easily be tailored to fit various dietary preferences. Whether you are vegan, gluten-free, or simply looking for a specific flavor profile, this recipe can accommodate your needs. By choosing the right nut butter (like almond or cashew) and using gluten-free oats, you can ensure that everyone can enjoy them. Exploring different sweeteners, such as agave or maple syrup, allows for further customization while still maintaining deliciousness.
Perfect for Meal Prep and On-the-Go Snacking
No-bake chocolate oat bars are an ideal solution for meal prep and on-the-go snacking. Their compact size makes them easy to pack in lunchboxes or gym bags, providing a nutritious boost when you need it most. Whether you enjoy them as a mid-morning snack, post-workout fuel, or an after-dinner treat, these bars are designed to keep you satisfied without the guilt.
Creative Variations and Additions
Suggestions for Alternative Nut Butters
While the recipe calls for peanut butter, feel free to experiment with other nut butters to create a unique flavor profile. Almond butter or cashew butter can add a different taste and texture. If you prefer a nut-free option, sunflower seed butter works exceptionally well, providing similar creaminess without the allergens.
Ideas for Different Sweetener Options
Adjusting the sweetener can also change the flavor of your bars. Instead of honey or maple syrup, consider using coconut nectar or brown rice syrup for a distinct twist. For a lower-calorie option, stevia or erythritol can be used, allowing you to enjoy sweetness without the added sugars.
Topping Variations to Enhance Flavor
Adding toppings is a simple way to elevate your no-bake chocolate oat bars. Consider sprinkling shredded coconut over the top for a tropical touch, or add crushed nuts for extra crunch. You can also incorporate mini chocolate chips or a dusting of cocoa powder for a more decadent dessert experience.
Suggestions for Incorporating Additional Ingredients
For those looking to boost the nutritional value, consider adding protein powder to the mix. This addition can turn your bars into a more substantial snack, especially for those focused on fitness. Dried fruits, such as cranberries or raisins, can add natural sweetness and chewiness, while chia seeds or flaxseeds can provide a dose of omega-3 fatty acids.
Nutritional Information
Breakdown of Calories and Macronutrients per Serving
Each serving of no-bake chocolate oat bars contains approximately 150-200 calories, depending on the specific ingredients used. The bars are rich in healthy fats, carbohydrates, and protein, making them a balanced snack option. A typical serving provides around 6-8 grams of protein, 5-7 grams of fiber, and 8-10 grams of fat, depending on your choice of nut butter.
Discussion on the Health Benefits of Each Ingredient
The main ingredients in these bars provide numerous health benefits. Oats are a great source of fiber, which aids digestion and helps you feel full longer. Nut butter contributes healthy fats and protein, while cocoa powder adds antioxidants, promoting heart health. By using natural sweeteners, you reduce refined sugar intake, aligning your snack with a healthier lifestyle.
Comparison with Store-Bought Snack Bars
When comparing homemade no-bake chocolate oat bars with store-bought options, the difference is significant. Many commercial bars contain high levels of added sugars, unhealthy fats, and artificial ingredients. In contrast, your homemade version is free from preservatives and additives, making it a more wholesome choice. Additionally, you can adjust the sweetness and ingredient ratios to suit your taste and dietary needs.
Conclusion
No-bake chocolate oat bars are not just easy to make; they are a delicious and nutritious alternative to traditional snacks. The simplicity of this recipe, combined with the numerous health benefits and customization options, makes it a must-try for anyone looking to indulge their sweet cravings in a healthier way. Whether you are preparing them for yourself or sharing them with friends and family, these bars will surely impress. We encourage you to give this recipe a try and explore the various variations to make it your own. Enjoy the satisfaction of creating a healthy, homemade snack that delights the taste buds while keeping guilt at bay.