Mini Chicken Nacho Tortilla Cups: A Delicious Appetizer for Every Occasion
If you’re looking for a crowd-pleasing appetizer that combines convenience, flavor, and fun presentation, look no further than Mini Chicken Nacho Tortilla Cups. This delightful dish offers a creative twist on traditional nachos, transforming them into bite-sized delights that are perfect for any gathering. Whether you’re hosting a game day party, celebrating a birthday, or simply enjoying a family movie night, these tortilla cups will impress your guests and keep them coming back for more.
The appeal of Mini Chicken Nacho Tortilla Cups lies not only in their taste but also in their quick preparation. With a handful of flavorful ingredients and a straightforward assembly process, you can whip up these tasty bites in no time. Each cup is a perfect combination of crunchy and creamy textures, making them a hit with both adults and kids alike. The versatility of this recipe also allows for customization, so you can tailor the ingredients to suit your preferences or dietary needs.
Understanding the Ingredients
To create the perfect Mini Chicken Nacho Tortilla Cups, it’s essential to understand the role of each ingredient. Here’s a closer look at the key components that come together to make this dish so irresistible.
Flour Tortillas
The foundation of these tortilla cups is flour tortillas, which provide a sturdy yet tender base for the filling. When baked, they become crispy and golden, creating a delightful crunch that contrasts beautifully with the toppings. Flour tortillas are preferred for their pliability and mild flavor, making them an excellent choice for holding the ingredients without overpowering them.
Cooked Shredded Chicken
One of the stars of this recipe is cooked shredded chicken, which adds protein and heartiness to the dish. For convenience, many home cooks opt for rotisserie chicken from the grocery store, which is not only flavorful but also saves time in the kitchen. Simply shred the chicken and mix it with your chosen spices and sauces to enhance its taste. This ingredient ensures that each bite is satisfying and filling.
Cheese
No nacho dish would be complete without cheese, and for these tortilla cups, cheddar cheese reigns supreme. Its sharp flavor and excellent melting properties make cheddar the ideal choice for adding richness and creaminess to the filling. As the cups bake, the cheese becomes gooey and bubbly, making them even more tempting for your guests. Feel free to experiment with other cheese varieties, such as Monterey Jack or pepper jack, for added flavor and a hint of spice.
Black Beans and Corn
To amp up the nutritional value and add texture to your tortilla cups, black beans and corn are excellent choices. Black beans are packed with protein and fiber, while corn contributes a sweet crunch that complements the other flavors. Both ingredients are also great at soaking up the spices and juices from the chicken, ensuring that every bite is bursting with deliciousness.
Fresh Vegetables
In addition to the main ingredients, incorporating fresh vegetables like diced red onion and tomatoes adds color, texture, and a burst of freshness to the tortilla cups. These veggies not only enhance the visual appeal but also provide a refreshing contrast to the richness of the cheese and chicken. You can also consider adding jalapeños for a kick of heat or avocado slices for a creamy finish, depending on your taste preferences.
Preparing the Tortilla Cups
Now that you’re familiar with the ingredients, it’s time to dive into the preparation of the tortilla cups. This step is crucial for ensuring that your cups turn out perfectly crispy and ready to be filled with delicious goodies.
Preheating the Oven and Preparing the Muffin Tin
Begin by preheating your oven to 375°F (190°C). This temperature is ideal for crisping the tortillas without burning them. While your oven heats up, take a standard muffin tin and lightly grease it with cooking spray or olive oil to prevent the tortilla cups from sticking.
Cutting and Shaping the Tortillas
Next, take your flour tortillas and cut them into smaller circles. A round cookie cutter or a glass can be used to achieve uniform sizes; aim for about 4-5 inches in diameter. This size will fit perfectly into the muffin tin, creating the ideal cup shape.
Once cut, gently press each tortilla circle into the greased muffin tin, ensuring that they form a cup shape. Use your fingers to mold them into the tin, making sure the edges are well-defined. Don’t worry if they don’t look perfect; they will crisp up nicely in the oven.
Achieving the Perfect Crispiness
To ensure that your tortilla cups crisp up nicely, bake them in the preheated oven for about 10-12 minutes, or until they are lightly golden brown. Keep a close eye on them to prevent burning, as oven temperatures can vary. Once they are done, remove them from the oven and let them cool slightly in the muffin tin. This will help them firm up even more before you add the filling.
Creating the Flavorful Filling
Now that your tortilla cups are ready, it’s time to focus on creating the flavorful filling that will make these cups truly shine.
Start by combining the shredded chicken, black beans, corn, and cheese in a large mixing bowl. Season the mixture with your favorite spices—cumin, chili powder, and garlic powder work wonderfully to enhance the flavors. Toss everything together until well combined, ensuring that the chicken and beans are evenly distributed throughout the mixture.
Next, fold in your fresh vegetables, such as diced red onion and tomatoes, for added freshness and crunch. If you’re using jalapeños for heat, add them at this stage as well. Mix gently to avoid mashing the ingredients, keeping the textures intact.
Your filling is now ready to be spooned into the crispy tortilla cups. This step is where the fun begins, as you can be generous with the amount you use to pack each cup. The goal is to create a deliciously overflowing bite that will be bursting with flavor when your guests take a bite.
Stay tuned for the next part of this article, where we’ll explore the final steps of baking these delicious Mini Chicken Nacho Tortilla Cups and discuss creative serving suggestions that will elevate your appetizer game.
{{image_2}}
Importance of Seasoning
To elevate the flavor of your Mini Chicken Nacho Tortilla Cups, seasoning is essential. Ground cumin and chili powder are not only aromatic but also add depth and a hint of warmth to the dish. Cumin has a warm, earthy aroma, while chili powder contributes just the right amount of heat. Salt and pepper are fundamental seasonings that enhance all other flavors, making them crucial in this recipe.
As you prepare your chicken mixture, feel free to adjust these seasonings according to your taste preferences. You might find that you prefer a bit more spice, or perhaps you want to dial it back a notch for a milder flavor. The beauty of this recipe lies in its flexibility, allowing you to customize the filling based on your palate.
Assembling the Mini Chicken Nacho Cups
Filling the Tortilla Cups
Now that you have your seasoned chicken mixture ready, it’s time to assemble your tortilla cups. Begin by preheating your oven to 375°F (190°C) to ensure it’s hot and ready for baking.
1. Prepare the Tortilla Cups: If you’re using store-bought tortilla cups, they are ready to use. However, if you’re making your own, take small corn or flour tortillas and place them in a muffin tin. Gently press the tortillas into the muffin cups to form little bowls.
2. Filling the Cups: Using a spoon, carefully fill each tortilla cup with your chicken mixture. Aim for about two tablespoons of filling per cup, ensuring that it’s well-packed but not overflowing.
3. Even Distribution: For even distribution, it can be helpful to fill all the cups partially, then go back and add more filling to each one. This method ensures that all cups have a similar amount of filling, making for an even bake.
Topping with Cheese
Once your tortilla cups are filled, it’s time to add cheese. Shredded cheddar cheese or a blend of Mexican cheeses work wonderfully for this recipe. Here are some tips to ensure a satisfying melt:
– Use freshly shredded cheese instead of pre-shredded varieties, as the latter often contain anti-caking agents that can prevent proper melting.
– Generously sprinkle a layer of cheese over each filled tortilla cup, making sure to cover all the filling. This not only adds flavor but also creates a deliciously gooey topping.
Baking to Perfection
Now that your Mini Chicken Nacho Tortilla Cups are filled and topped with cheese, it’s time to bake them to perfection.
1. Baking Time and Temperature: Place the muffin tin in the preheated oven and bake for about 12-15 minutes. Keep an eye on them as baking times can vary based on your oven and the thickness of your tortillas.
2. What to Look For: You’ll know your tortilla cups are ready when the cheese is bubbling and slightly golden, and the edges of the tortillas are crispy. If you want extra crispiness, you can broil them for an additional 1-2 minutes at the end of the baking time, but be sure to watch them closely to prevent burning.
Serving Suggestions
Once baked, it’s time to serve your Mini Chicken Nacho Tortilla Cups. Presentation is key, especially for appetizers!
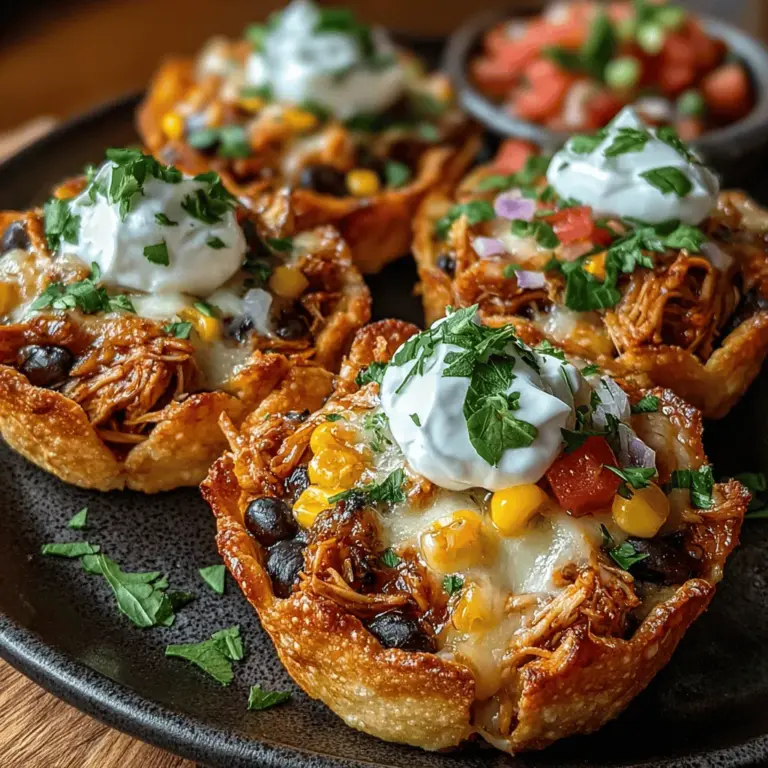
1. Plating the Cups: Arrange the cups on a colorful serving platter. You can create a festive look by using a variety of toppings and garnishes.
2. Garnishing: Top each Mini Chicken Nacho Cup with a dollop of sour cream, a drizzle of salsa, or slices of creamy avocado. Not only do these add flavor, but they also enhance the visual appeal.
3. Side Dishes and Condiments: Consider serving with additional salsa, guacamole, or a fresh salad to round out the meal. Chips and a zesty dip can also make for great companions, ensuring your guests have plenty of options.
Nutritional Information
Understanding the nutritional benefits of your Mini Chicken Nacho Tortilla Cups can help you enjoy them guilt-free.
– Key Ingredients: Chicken breast is a lean source of protein, making it a healthy choice for the filling. Tortillas provide carbohydrates, while cheese adds calcium and fat. Additionally, toppings like avocado offer healthy fats, and fresh salsa can boost your intake of vitamins.
– Portion Size: Each tortilla cup can be a single serving or can be enjoyed as part of a larger spread. Depending on your dietary goals, you might want to limit yourself to 2-3 cups as a serving size, especially if served with rich sides.
Conclusion
Mini Chicken Nacho Tortilla Cups are not only a delicious appetizer but also a versatile dish that can be tailored to suit any gathering. Whether you’re hosting a game day party, a casual get-together, or simply craving a tasty snack, this recipe is sure to delight your family and friends.
By trying your hand at this easy-to-follow recipe, you’ll enjoy the delightful flavors that come from well-seasoned chicken, a crispy tortilla base, and melted cheese. The joy of creating and sharing homemade appetizers is truly unmatched. So gather your ingredients, embrace your culinary creativity, and enjoy the process of making these Mini Chicken Nacho Tortilla Cups, because good food is best when shared!