Introduction
Indulging in dessert is a delightful way to conclude a meal, and nothing quite compares to the luxurious experience of a Decadent Chocolate Peanut Butter Lava Cake. This rich and gooey dessert combines the intense flavor of dark chocolate with the creamy goodness of peanut butter, creating a symphony of tastes that will satisfy any sweet tooth. Whether you’re hosting a dinner party, celebrating a special occasion, or simply treating yourself to a decadent dessert, this lava cake is sure to impress.
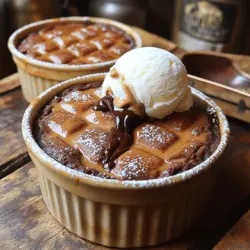
The allure of a lava cake lies in its unique texture and rich flavors. When you cut into this exquisite dessert, molten chocolate flows from the center, creating a delightful contrast with the cake’s outer layer. The addition of peanut butter elevates the traditional chocolate lava cake, introducing a nutty richness that complements the deep cocoa notes beautifully. The combination is not only visually stunning but also offers a taste experience that is both comforting and indulgent.
In this comprehensive guide, we will take you through each step of the recipe, offering insights into ingredient choices, baking techniques, and serving suggestions to ensure your lava cake turns out perfectly every time. We will explore the history of lava cakes, the perfect balance of chocolate and peanut butter, and what makes this recipe truly stand out from the crowd. Get ready to elevate your dessert game with this show-stopping treat!
Understanding the Decadent Chocolate Peanut Butter Lava Cake
Overview of Lava Cakes
Lava cakes, also known as molten chocolate cakes, have gained immense popularity since their introduction in the 1980s. Their unique combination of a baked outer layer and a gooey chocolate center has made them a favorite in restaurants and home kitchens alike. Originating from a desire to create a dessert that combined the richness of cake with the indulgence of flowing chocolate, lava cakes quickly became a staple on dessert menus worldwide.
The classic lava cake is made with a simple batter that consists of chocolate, butter, eggs, sugar, and flour. However, the real magic happens during the baking process. Achieving the ideal molten center requires precise timing, as the cake must be cooked enough to set the outer layer while leaving the inside delightfully gooey. This balance between cooked and uncooked is what makes lava cakes so enticing and memorable.
The Allure of Chocolate and Peanut Butter Combinations
The pairing of chocolate and peanut butter is a timeless classic, beloved by dessert enthusiasts everywhere. The rich, creamy texture of peanut butter complements the deep, bittersweet notes of dark chocolate, creating a harmonious blend of flavors that tantalizes the taste buds. This combination is not only popular for its taste but also for the nostalgic feelings it evokes for many.
From peanut butter cups to cookies, this duo has found its way into countless recipes. The Decadent Chocolate Peanut Butter Lava Cake takes this beloved pairing to new heights, offering a dessert that is both indulgent and comforting. The molten peanut butter center adds an extra layer of flavor and richness that elevates the traditional lava cake to a new level of decadence.
Why This Recipe Stands Out
What sets this Decadent Chocolate Peanut Butter Lava Cake apart from other lava cake recipes is the use of high-quality ingredients and the careful balance of flavors. By incorporating dark chocolate and creamy peanut butter, this recipe creates a dessert that is not only satisfying but also visually stunning. The contrast between the rich, dark exterior and the golden peanut butter center is sure to impress your guests.
Moreover, this recipe is designed for both novice bakers and experienced confectioners, providing step-by-step guidance to ensure success. Whether you’re baking for a special occasion or just to satisfy a sweet craving, this lava cake is easy to make yet delivers an impressive finish. With a few simple techniques and the right ingredients, you’ll be able to create a dessert that feels gourmet without the fuss.
Essential Ingredients for the Perfect Lava Cake
Before diving into the baking process, it’s essential to gather all the necessary ingredients. Each component plays a crucial role in achieving the perfect texture and flavor. Here’s a breakdown of what you will need for this decadent dessert:
Dark Chocolate: The Heart of the Flavor
The star of this dessert is undoubtedly the dark chocolate. It provides a rich, intense flavor that serves as the foundation of the lava cake. For the best results, choose high-quality chocolate with a cocoa content of at least 60% to 70%. This will ensure that your lava cake has a deep, complex flavor profile.
When melting chocolate, opt for a brand that you enjoy eating on its own, as its flavor will be prominent in the final product. Additionally, using chocolate that is specifically labeled for baking can help achieve a smooth texture and better melting properties.
Unsalted Butter: Importance in Baking
Butter is a key ingredient in most baked goods, and this recipe is no exception. Unsalted butter is preferred because it allows you to control the amount of salt in the recipe. The fat in the butter contributes to the cake’s moistness and richness, while also helping to create a tender crumb.
When using butter, make sure it is at room temperature for easy incorporation into the batter. This will help achieve a smooth mixture and ensure that the chocolate and butter melt together seamlessly.
Creamy Peanut Butter: Choosing the Right Type
Peanut butter adds a unique flavor and creaminess to the lava cake. For the best results, opt for a creamy peanut butter that is made from roasted peanuts and doesn’t contain added sugars or oils. Natural peanut butter will give you a rich flavor without any unnecessary additives.
You can also experiment with different types of peanut butter, such as crunchy or flavored varieties, but be mindful that this may alter the overall texture and taste of your lava cake. The goal is to achieve a gooey, molten center that flows beautifully when the cake is cut.
Eggs: Role in Texture and Structure
Eggs play a vital role in the structure and texture of the lava cake. They provide stability and help the cake rise during baking. The combination of whole eggs and egg yolks ensures that the cake has a tender crumb while allowing for that signature molten center.
Make sure your eggs are at room temperature as well, as this helps them incorporate better into the batter and contributes to an even texture. Beating the eggs until they are light and frothy will also help create a lighter cake, which is essential for achieving that perfect lava-like consistency.
Granulated Sugar: Balancing Sweetness
Granulated sugar is essential for sweetening the cake and balancing the bitterness of the dark chocolate. It also helps with the overall texture, contributing to the cake’s rise and moisture. You can adjust the amount of sugar in the recipe to suit your taste, but keep in mind that reducing it too much may affect the cake’s structure.
For a twist, consider using brown sugar instead of granulated sugar. Brown sugar adds a hint of molasses flavor, which can enhance the overall taste of the lava cake and provide additional moisture.
All-Purpose Flour: Achieving the Right Consistency
All-purpose flour is the primary dry ingredient in this recipe, providing structure to the cake. It’s important to measure the flour accurately to avoid a dense or dry cake. To ensure accurate measurement, spoon the flour into a measuring cup and level it off with a knife rather than scooping directly from the bag.
Using too much flour can lead to a cake that isn’t as gooey in the center, so be mindful of the measurement. You want just enough flour to hold the cake together without compromising the molten center that makes lava cakes so appealing.
Vanilla Extract and Salt: Enhancing Flavor Profiles
Lastly, don’t forget to add a splash of vanilla extract and a pinch of salt. Vanilla extract enhances the overall flavor of the cake, while salt helps balance the sweetness and brings out the chocolate’s rich notes. These two ingredients may seem small, but they play an essential role in elevating the flavor profile of your lava cake.
In summary, gathering high-quality ingredients is crucial for creating a Decadent Chocolate Peanut Butter Lava Cake that impresses. Each component contributes to the texture and flavor, ensuring that your dessert will be a hit at any gathering.
Preparation Steps for Your Lava Cake
Now that you have all your ingredients ready, it’s time to dive into the preparation steps for your Decadent Chocolate Peanut Butter Lava Cake. Following these instructions will help ensure that your cake bakes perfectly and results in that coveted molten center.
Preheating the Oven: Importance of Temperature Control
The first step in preparing your lava cake is to preheat your oven. This step is crucial as it ensures that the cake bakes evenly and achieves the right texture. Preheating the oven to 425°F (220°C) is recommended for optimal results. An adequately preheated oven will help set the outer layer of the cake quickly while keeping the center gooey.
While your oven is preheating, you can move on to the next steps in the preparation process, maximizing your efficiency in the kitchen.
Greasing Ramekins: Techniques for Easy Release
After preheating the oven, the next step is to prepare your ramekins. Ramekins are typically used for baking individual portions of lava cake, and proper greasing is essential to ensure easy release after baking.
Begin by generously greasing each ramekin with unsalted butter, making sure to cover the entire interior surface. This will prevent the cake from sticking and allow it to slide out effortlessly once baked. For added security against sticking, you can dust the greased ramekins with a light coating of cocoa powder, which not only helps with release but also adds a touch of flavor.
Melting Chocolate and Butter: Methods and Tips
The final preparation step involves melting the dark chocolate and butter together. There are a couple of methods you can use to achieve this, each with its pros and cons.
1. Double Boiler Method: Fill a medium saucepan with a couple of inches of water and bring it to a simmer. Place a heatproof bowl over the saucepan, ensuring it doesn’t touch the water. Add the chopped dark chocolate and butter to the bowl, stirring frequently until both are melted and smooth. This method provides gentle heat and helps prevent the chocolate from seizing.
2. Microwave Method: Alternatively, you can melt the chocolate and butter in the microwave. Place the chopped chocolate and butter in a microwave-safe bowl and heat in 30-second intervals, stirring in between until fully melted and smooth. Be cautious not to overheat, as chocolate can burn easily in the microwave.
Once the chocolate and butter are melted and well combined, allow the mixture to cool slightly before proceeding to mix it with the other ingredients. This step is important to prevent the eggs from scrambling when combined with the warm chocolate mixture.
With these initial steps completed, you’re well on your way to creating a stunning Decadent Chocolate Peanut Butter Lava Cake. The next stages will guide you through combining the ingredients and baking the cake to perfection, ensuring a delightful dessert that you and your guests will love. Stay tuned for the continuation of this delicious journey!
{{image_2}}
Incorporating Peanut Butter: Ensuring a Smooth Mixture
To achieve the signature flavor of our Decadent Chocolate Peanut Butter Lava Cake, the incorporation of peanut butter is crucial. Start by measuring out the desired amount of creamy peanut butter—opt for a high-quality brand to enhance the flavor profile of your dessert.
In a small saucepan, gently heat the peanut butter over low heat, stirring continuously until it becomes smooth and slightly runny. This step is essential as it helps the peanut butter blend seamlessly into the chocolate mixture. Once the chocolate has melted, remove both the chocolate and peanut butter from the heat and allow them to cool for a few minutes. Then, slowly drizzle the melted peanut butter into the chocolate mixture, whisking vigorously until you have a smooth and unified texture. This ensures that every bite of your cake will be infused with that delicious peanut butter flavor, contributing to the cake’s rich, gooey center.
Whisking the Eggs and Sugar: Achieving the Right Fluffiness
Next, it’s time to whisk together the eggs and sugar. In a large mixing bowl, crack four large eggs and add half a cup of granulated sugar. Using a hand whisk or an electric mixer, beat the mixture on medium speed until it becomes pale and fluffy. This process is vital because the air incorporated during whisking will help the cake rise and develop a light, airy texture.
Typically, you should whisk the eggs and sugar for about 3 to 5 minutes. You’re looking for a ribbon-like consistency; when you lift the whisk out of the mixture, it should leave a trail that holds its shape for a few seconds before disappearing. This step is essential for achieving that perfect lava center, as the fluffiness of the eggs helps create the necessary lift in the cake.
Combining Mixtures: Folding Techniques Explained
Once your eggs and sugar are perfectly whisked, it’s time to combine the mixtures. Begin by gently folding the chocolate and peanut butter mixture into the egg and sugar mixture. Use a spatula to scoop from the bottom of the bowl and fold the mixtures together, being careful not to deflate the air you’ve just incorporated.
Folding is an essential technique in baking, as it allows you to combine ingredients without losing the lightness of the batter. Continue folding until you see no streaks of chocolate or peanut butter, but be careful not to overmix, which could lead to a denser cake.
After the ingredients are combined, it’s time to incorporate the flour, which will give the cake structure while still allowing for that molten center.
Sifting and Adding Flour: Importance of Texture
Sifting the flour is a crucial step in ensuring the cake has a light and airy texture. Measure out half a cup of all-purpose flour and sift it into a separate bowl to remove any lumps. Then, gently fold the sifted flour into your batter using the same careful technique previously mentioned.
This step is not just about combining ingredients; it’s about ensuring the flour is evenly distributed throughout the batter. Uneven flour distribution can lead to a cake with an uneven texture, which can affect the overall baking process. Continue folding until the flour is just incorporated. Remember, the goal is a smooth batter that is not overworked.
Baking the Lava Cake to Perfection
Pouring the Batter: Ensuring Even Distribution
With the batter ready, it’s time to pour it into prepared ramekins or a muffin tin. Ensure that each ramekin is generously greased with butter and dusted with cocoa powder or flour to prevent sticking. Using a ladle or a measuring cup, carefully distribute an equal amount of batter into each ramekin.
This step is crucial for ensuring that each cake bakes evenly and maintains a consistent lava center. You want to fill each container about 3/4 full to allow room for the cakes to rise without overflowing.
Baking Time and Temperature: Key Indicators for Doneness
Preheat your oven to 425°F (220°C) before baking. Place the filled ramekins on a baking sheet for easier handling and to catch any potential spills. Bake the cakes for about 12-14 minutes. The edges should appear firm, while the center remains soft and slightly wobbly.
Keep a close eye on the cakes in the last few minutes of baking; overbaking can result in a cake that lacks the desired molten center. You can test them by gently shaking the baking sheet; if the centers jiggle slightly, they are ready to come out of the oven.
The Perfect Bake: Identifying the Right Texture
Once your lava cakes are out of the oven, allow them to cool for just a minute before attempting to remove them from their ramekins. The perfect bake will yield a cake with a set outer layer and a gooey, flowing center. If you’ve baked them correctly, they should easily slide out of the ramekins when inverted onto a dessert plate.
Pay attention to the smell; the rich aroma of chocolate and peanut butter should fill your kitchen, hinting at the delicious dessert that awaits.
Serving Suggestions for an Indulgent Experience
Inverting the Lava Cake: Techniques for Presentation
To serve the lava cakes in a visually appealing manner, carefully invert each ramekin onto a plate. You can gently tap the bottom of the ramekin to help release the cake. Allow it to sit for a moment before lifting the ramekin to reveal the beautifully baked cake.
If you encounter any resistance, do not force it; gently run a knife around the edge of the ramekin to loosen the cake before attempting to invert it again.
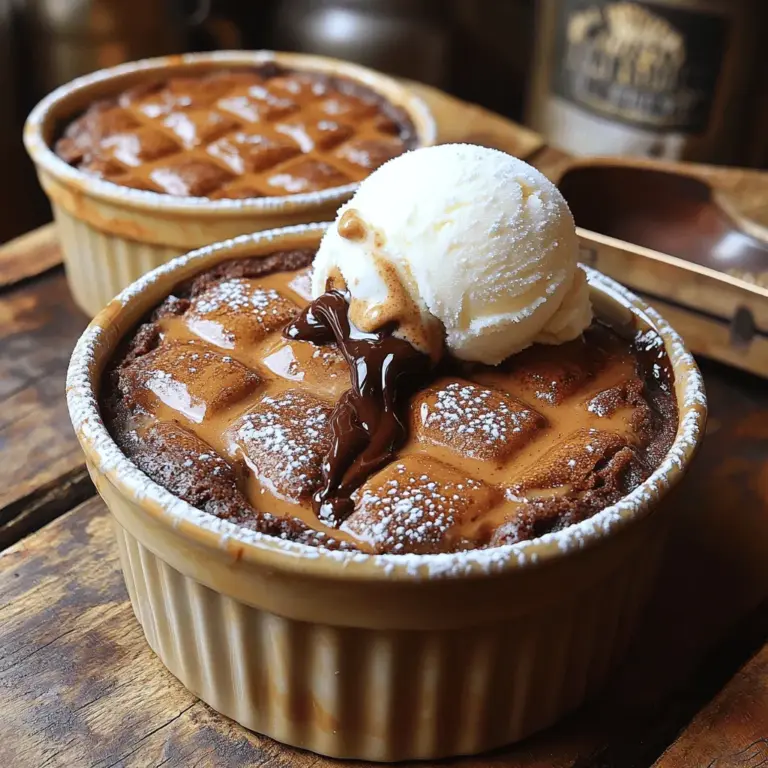
Garnishing Ideas: From Powdered Sugar to Fresh Fruits
Presentation is key to elevating your dessert. Once inverted, you can sprinkle a light dusting of powdered sugar on top of the cake for an elegant touch. Additionally, consider adding a few fresh raspberries or strawberries around the plate to add a pop of color. The tartness of the berries beautifully complements the rich flavors of the chocolate and peanut butter.
You can also drizzle some chocolate sauce or caramel sauce over the top for added indulgence. For a more sophisticated finish, consider adding a few mint leaves for color and freshness.
Pairing with Ice Cream or Whipped Cream: Enhancing Flavor
Serving your lava cake with a scoop of vanilla ice cream or a dollop of freshly whipped cream takes this dessert to the next level. The cold creaminess of the ice cream contrasts beautifully with the warm, molten center of the cake, creating a delightful balance of flavors and textures.
For an extra layer of flavor, try adding a sprinkle of sea salt on top of the whipped cream or ice cream, as it enhances the sweetness and richness of the chocolate and peanut butter.
Making the Most of Your Dessert
Storage Tips: Keeping Leftovers Fresh
If you have any leftover lava cakes, store them in an airtight container in the refrigerator. They can typically be kept fresh for up to 2-3 days. To maintain their soft texture, avoid freezing them, as this can alter the consistency of the molten center.
Reheating Instructions: Restoring the Lava Texture
When you’re ready to enjoy the leftover lava cake, preheat your oven to 350°F (175°C). Place the ramekin on a baking sheet and cover it loosely with aluminum foil to prevent burning. Warm the cake in the oven for about 10-15 minutes, or until heated through. Alternatively, you can microwave the cake for about 30 seconds, but be cautious not to overheat, as this can cause the cake to cook further and lose its lava-like center.
Variations on the Classic Recipe: Exploring Alternatives
While the classic chocolate and peanut butter combination is hard to beat, don’t hesitate to experiment with different flavors. For a fruity twist, consider adding a raspberry or strawberry puree into the center of the cake before baking. You could also swap out the peanut butter for almond butter or Nutella for a different flavor profile. For those who enjoy a bit of spice, adding a pinch of cayenne pepper or espresso powder can elevate the chocolate flavors even further.
Conclusion
Creating a Decadent Chocolate Peanut Butter Lava Cake is not only a rewarding endeavor but an experience that brings joy to both the baker and the diners. With its rich flavors and pleasing presentation, this dessert is sure to be a highlight at any gathering. By mastering the techniques outlined in this guide, you can confidently impress your friends and family with a dessert that is as delicious as it is visually stunning. The combination of chocolate and peanut butter will leave your taste buds craving more, making this recipe a must-try for any dessert lover.