Crunchy Dilly Beans Delight Recipe
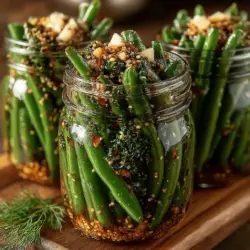
Pickling is a time-honored tradition that has captivated home cooks and food enthusiasts alike for centuries. This method of preserving vegetables not only extends their shelf life but also enhances their flavors, resulting in vibrant, tangy treats that can brighten up any meal. Among the myriad of pickled vegetables, Crunchy Dilly Beans stand out as a particularly popular choice. These crunchy green beans, infused with a zesty brine and aromatic spices, make for a delightful snack or a zesty side dish that can elevate everything from picnics to family dinners.
The appeal of Crunchy Dilly Beans lies in their perfect balance of tanginess and crunch. They offer a refreshing bite that can complement rich dishes or serve as a standalone treat. Moreover, the simplicity of their preparation makes them an excellent option for both novice cooks and seasoned chefs. With minimal ingredients and a quick prep time, this recipe allows anyone to enjoy the satisfaction of homemade pickles without the complexity often associated with canning.
Understanding Dilly Beans
Dilly beans are essentially pickled green beans, a delightful combination that marries the crispness of fresh beans with the bold flavors of garlic, dill, and vinegar. This dish finds its roots in various culinary traditions across the globe, particularly in North America, where home canning and preserving have become a cherished practice. The concept of pickling vegetables dates back thousands of years, originating as a means to preserve food for the off-season and make use of surplus harvests.
Green beans, the star of this recipe, are not only tasty but also packed with health benefits. They are an excellent source of vitamins A, C, and K, as well as folate and fiber, making them a nutritious addition to any diet. Their vibrant green color is indicative of their high antioxidant content, which can help combat oxidative stress in the body. Additionally, green beans are low in calories, making them a guilt-free snack that can satisfy cravings while providing essential nutrients.
The flavor profile of dilly beans is a delightful blend of savory, tangy, and aromatic notes. The sharpness of vinegar, the earthiness of dill, and the zest of garlic come together to create a taste experience that is both refreshing and satisfying. These pickled beans can enhance a variety of meals, from being served alongside grilled meats to being chopped and added to salads for an extra crunch. Their versatility makes them a staple in many kitchens, and they are often enjoyed straight from the jar.
Ingredients Breakdown
To create the perfect batch of Crunchy Dilly Beans, it’s essential to understand the role of each ingredient in the recipe. Here’s a detailed breakdown:
– Fresh Green Beans: The key to any great dilly bean recipe is the freshness of the green beans. Look for beans that are vibrant in color, firm to the touch, and free from blemishes. It’s best to choose beans that are similar in size for uniform pickling, ensuring each bite has the same delightful crunch.
– White Vinegar: This ingredient plays a crucial role in the pickling process. White vinegar provides the necessary acidity to preserve the beans and gives them their signature tangy flavor. It’s important to use a vinegar with at least 5% acidity for effective pickling.
– Salt and Sugar: These two ingredients are essential for balancing the flavors of the brine. Salt not only enhances the taste but also helps to draw moisture out of the beans, contributing to their crunchiness. Sugar, on the other hand, helps to mellow the acidity of the vinegar, creating a more rounded flavor profile. The right balance of salt and sugar is key to achieving the perfect taste.
– Garlic and Mustard Seeds: These ingredients add depth to the flavor of the dilly beans. Garlic provides a robust aroma and taste, while mustard seeds contribute a subtle spiciness and texture to the pickles. Together, they elevate the overall experience, making each bite more delightful.
– Dill Seeds vs. Fresh Dill: Dill is the star herb in this recipe, and you can use either dill seeds or fresh dill. Dill seeds have a more concentrated flavor and are often used in pickling, while fresh dill provides a bright, herbaceous note. Depending on your preference, feel free to experiment with both to find the combination that suits your palate.
– Optional Red Pepper Flakes: If you enjoy a bit of heat, adding red pepper flakes is an excellent way to customize your dilly beans. This optional ingredient allows you to adjust the spiciness to your liking, making the recipe adaptable to various taste preferences.
Step-by-Step Instructions
Now that you have a solid understanding of the ingredients, it’s time to dive into the preparation process. This recipe is straightforward, making it accessible for anyone eager to try their hand at pickling.
Prepare the Green Beans
The first step in making Crunchy Dilly Beans is to prepare the green beans. Start by rinsing them thoroughly under cold water to remove any dirt or debris. Once cleaned, trim the ends of the beans to achieve a uniform length, which is crucial for even pickling. Aim for beans that are about 4 to 5 inches long for optimal presentation and texture.
After trimming, it’s a good idea to blanch the beans for just a couple of minutes in boiling water. This helps to maintain their vibrant color and crispness while also making them more pliable for packing into jars. Once blanched, immediately transfer the beans to an ice bath to stop the cooking process. This step is essential for ensuring that your dilly beans remain crunchy and visually appealing.
Boil the Brine
While the green beans cool, it’s time to prepare the brine. In a medium saucepan, combine equal parts white vinegar and water, along with the appropriate amounts of salt and sugar. Bring the mixture to a boil over medium-high heat, stirring occasionally to ensure that the salt and sugar dissolve completely. The process of boiling the brine is crucial, as it not only helps to incorporate the flavors but also prepares the liquid for the pickling process.
Once the brine reaches a rolling boil, remove it from the heat. This is the moment to add in the garlic, mustard seeds, and dill (whether seeds or fresh) to infuse the liquid with their aromatic qualities. Allow the brine to steep for a few minutes, enabling the flavors to meld together beautifully.
With the green beans prepped and the brine ready, you’re well on your way to creating a batch of Crunchy Dilly Beans that will impress your family and friends. The next steps will involve packing the beans into jars and pouring the flavorful brine over them, a simple yet rewarding process that will yield delicious results. Stay tuned for the continuation of this recipe, where we will guide you through the final steps of canning and enjoying your homemade dilly beans.
{{image_2}}
Boiling Time and Temperature for Best Results
To achieve the perfect crunch and flavor in your Crunchy Dilly Beans Delight, the temperature and boiling time are critical. When preparing the brine, bring it to a rolling boil at 212°F (100°C). This high temperature ensures that the ingredients dissolve completely and that the flavors meld beautifully.
Boil the brine for about 5 minutes before pouring it over your beans. This short boiling time is essential to maintain the beans’ crisp texture while allowing the flavors to infuse. Overcooking can lead to mushy beans, so keep a close eye on your timer.
Adding Flavor
Introducing Flavors with Garlic, Mustard Seeds, and Dill
The cornerstone of any superb pickling recipe lies in the balance of flavors. For your Dilly Beans, start with fresh garlic cloves—2 to 4 cloves per jar, depending on your taste preference. Crush or slice the garlic to release its oils, enhancing the brine’s flavor profile.
Mustard seeds add a delightful crunch and a hint of warmth. Use 1 teaspoon per jar, and consider toasting them lightly in a dry skillet to amplify their flavor before adding them to the jars. Finally, fresh dill sprigs are essential for that classic dilly flavor. A sprig or two per jar will infuse your beans with aromatic goodness.
Importance of Simmering for Flavor Melding
After combining your brine ingredients, simmer the mixture for about 5 minutes. This step allows the garlic, mustard seeds, and dill to release their flavors into the brine. The aromatic steam will fill your kitchen, setting the stage for the delicious pickles to come.
During this simmering process, keep the heat steady, ensuring that the brine remains at a gentle boil. This technique not only melds the flavors but also enhances the overall taste of your Dilly Beans Delight.
Packing the Jars
Jar Preparation and Packing Techniques
Before packing, ensure your jars are clean and sterilized. You can do this by placing them in a boiling water bath for 10 minutes or running them through a dishwasher on a hot cycle. Proper sterilization is crucial to prevent spoilage and ensure your pickles last.
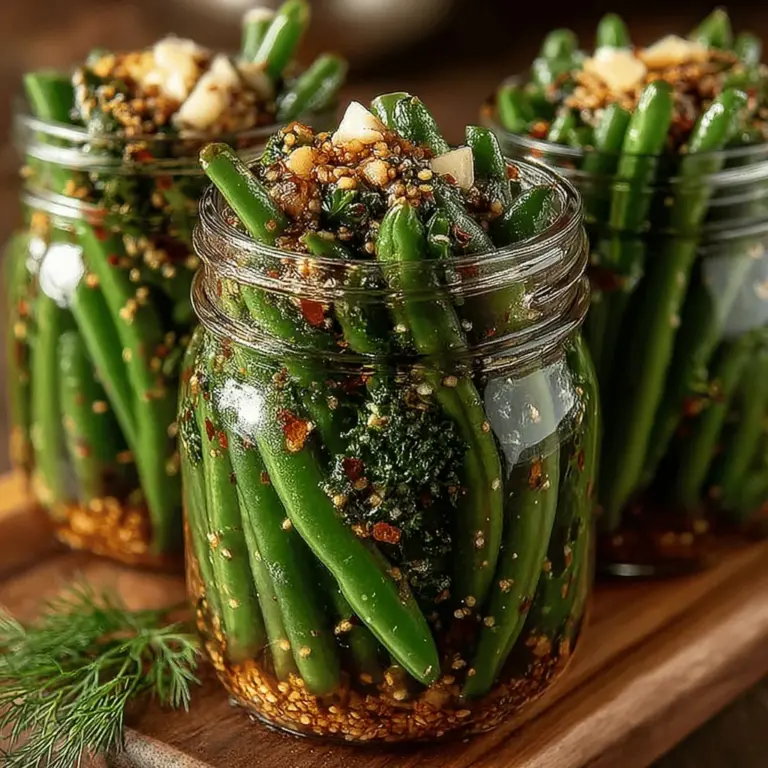
When packing your beans into the jars, arrange them vertically for a neat presentation. Begin by placing a few sprigs of dill and a couple of garlic cloves at the bottom of the jar. Next, pack the green beans tightly but not so tightly that they become squished. This arrangement allows for even distribution of flavors throughout the beans.
Arrangement of Beans and Spices
As you pack each jar, sprinkle in some mustard seeds and dill between layers of beans. This technique ensures that the flavors are evenly distributed. Leave about half an inch of headspace at the top of the jar to allow for expansion when the brine is added and during the cooling process.
Pouring the Hot Brine
Ensuring Beans are Submerged
Once your brine is ready and your jars are packed, it’s time to pour in the hot liquid. Carefully ladle the brine into each jar, ensuring that the beans are fully submerged. This is essential for proper pickling, as any exposed beans may spoil.
Pay attention to the headspace; it’s important to leave about half an inch at the top of each jar. This space accommodates any bubbling during the cooling process and helps maintain the seal once the jars are sealed.
Safety Tips for Handling Hot Liquids
When working with hot brine, exercise caution. Use a funnel to avoid spills and protect your hands with oven mitts. If any brine spills on the rim of the jar, wipe it clean with a damp cloth to ensure a proper seal when you cap the jars.
Sealing and Cooling
The Cooling Process
After filling the jars, place the lids on them while the brine is still hot. This helps create a vacuum seal as the jars cool down. Allow the jars to sit at room temperature for about 12-24 hours until they are completely cool.
During this cooling period, the flavors will continue to develop and meld, enhancing the overall taste of your Dilly Beans Delight. You may hear a popping sound as the jars seal, indicating that the vacuum has formed.
Refrigeration Time for Optimal Taste
For the best results, refrigerate your jars after they have cooled. While you can technically enjoy them after a few hours, allowing the Dilly Beans to sit for at least 48 hours before consuming will result in a more robust flavor. The longer they sit, the more pronounced the flavors will become.
Serve and Enjoy
Creative Serving Suggestions
Crunchy Dilly Beans are incredibly versatile. They make an excellent snack on their own, but they can also elevate a variety of dishes. Serve them as a tangy side dish alongside grilled meats or fish, or chop them up and toss them into salads for a zesty crunch.
For a delightful charcuterie board, arrange your Dilly Beans alongside cured meats, cheeses, and crusty bread. They add a refreshing element that contrasts beautifully with rich flavors.
Versatility of the Dish
These pickled beans are not just limited to side dishes. Incorporate them into sandwiches or burgers for added flavor and crunch. They can even be blended into dips for an unexpected twist. Whether enjoyed straight from the jar or as an essential ingredient in a meal, Crunchy Dilly Beans Delight offers endless possibilities.
Nutritional Information
Crunchy Dilly Beans are not only delicious but also come with numerous health benefits. A typical serving contains approximately 20 calories, making them a low-calorie snack option. They are rich in vitamins A and C, providing essential nutrients while being low in fat and carbs.
Incorporating pickled foods into your diet can offer digestive benefits, as the fermentation process promotes gut health. The probiotics found in fermented foods are known to support a healthy microbiome, which can enhance digestion and overall well-being.
Conclusion
Making Crunchy Dilly Beans Delight is an incredibly rewarding experience. With simple ingredients and straightforward steps, you can create a flavorful and crunchy snack that stands out in any culinary setting. This recipe not only allows you to preserve fresh green beans but also encourages you to experiment with flavors that suit your palate.
Reflect on the joy of crafting homemade pickles, which not only bring a sense of accomplishment but also a delicious addition to your pantry. So gather your ingredients, follow these steps, and enjoy the satisfaction of creating your very own Dilly Beans Delight. Embrace the creativity of pickling and make this recipe your own by experimenting with different spices and herbs. Happy pickling!