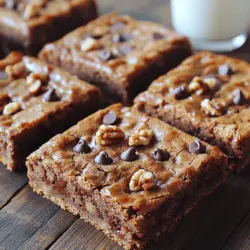
If you’re looking for a dessert that combines the comforting taste of cookies with the rich decadence of chocolate, then look no further than Chocolate Heaven Cookie Bars. These delightful treats are a perfect blend of soft, chewy cookie texture and the intense flavor of chocolate, making them a beloved favorite among dessert lovers of all ages. Whether you’re hosting a gathering, preparing a special treat for your family, or simply indulging your sweet tooth, these cookie bars are sure to impress.
What makes Chocolate Heaven Cookie Bars truly irresistible is not only their taste but also the simplicity of the recipe. With easy-to-find ingredients and straightforward instructions, both novice bakers and experienced chefs can whip up a batch of these delicious bars in no time. In this article, we will explore the ingredients that contribute to the rich flavor and texture of the cookie bars, outline the essential equipment needed, and provide you with step-by-step baking instructions to create your own Chocolate Heaven Cookie Bars.
Understanding the Ingredients
Before diving into the baking process, it’s essential to understand the key ingredients that contribute to the rich flavor and texture of Chocolate Heaven Cookie Bars. Each ingredient plays a vital role in ensuring that the final product is soft, chewy, and bursting with chocolate goodness.
All-Purpose Flour
All-purpose flour is the cornerstone of any cookie recipe, and it’s no different for our Chocolate Heaven Cookie Bars. It provides the necessary structure and stability, allowing the bars to hold their shape while remaining soft and chewy. The right flour-to-liquid ratio is crucial, as too much flour can lead to dry bars, while too little can result in a gooey mess.
Baking Soda and Salt
Baking soda is a key ingredient in cookie recipes, acting as a leavening agent that helps the bars rise and achieve a light, fluffy texture. When combined with an acidic ingredient in the dough, baking soda releases carbon dioxide, which creates tiny bubbles that give the cookies their lift. Salt, on the other hand, enhances the overall flavor by balancing the sweetness of the sugars and contributing to the complexity of the taste.
Unsalted Butter
Using unsalted butter is essential for achieving the perfect flavor and texture in Chocolate Heaven Cookie Bars. Softened butter is crucial for the creaming process, where it is beaten together with sugars to create a light and airy mixture. This process is vital for incorporating air into the dough, resulting in a tender and chewy cookie bar. Since butter is a key flavor component, using unsalted allows you to control the saltiness of the final product.
Sugars
The combination of granulated sugar and brown sugar is what makes these cookie bars special. Granulated sugar provides sweetness and helps the bars to crisp slightly around the edges, while brown sugar adds moisture and a deep, rich flavor with hints of caramel. The moisture from brown sugar also contributes to the chewy texture that we all love in cookie bars.
Eggs and Vanilla Extract
Eggs serve multiple purposes in baking, acting as a binding agent that helps hold the ingredients together while adding moisture. The proteins in eggs also help stabilize the structure of the cookie bars. Vanilla extract is another crucial ingredient, providing aromatic flavor that complements the chocolate and enhances the overall taste of the bars.
Chocolate Chips and Nuts
No Chocolate Heaven Cookie Bars would be complete without a generous amount of chocolate chips. These sweet morsels melt slightly during baking, creating pockets of gooey chocolate throughout the bars. For an added crunch and depth of flavor, consider incorporating chopped nuts, such as walnuts or pecans. Nuts not only add texture but also a nutty flavor that balances the sweetness of the chocolate.
Essential Equipment Needed
To create your Chocolate Heaven Cookie Bars successfully, you’ll need a few essential pieces of equipment. Having the right tools on hand will make the baking process smoother and more enjoyable.
Mixing Bowls
Having a set of mixing bowls in various sizes is crucial for effectively combining your ingredients. A large bowl is ideal for creaming the butter and sugars, while smaller bowls can be used to separate dry ingredients such as flour, baking soda, and salt. Opt for glass or stainless steel bowls for durability and ease of cleaning.
Electric Mixer
An electric mixer is highly recommended for achieving the perfect consistency in your batter. Whether you use a stand mixer or a handheld version, the mixer will help you cream the butter and sugars to the desired light and fluffy texture. Mixing by hand can be labor-intensive and may not yield the same results, so investing in an electric mixer can save you time and effort.
Baking Pan
A 9×13 inch baking pan is the perfect size for this recipe, allowing the cookie bars to bake evenly while providing enough space for them to rise. Make sure to use a metal or glass pan, as these materials conduct heat well, ensuring that your bars bake properly. If you prefer thicker cookie bars, you can use a smaller pan, but be sure to adjust the baking time accordingly.
Parchment Paper
Using parchment paper is a game-changer when it comes to baking cookie bars. Lining your baking pan with parchment paper not only prevents the bars from sticking but also makes for easy removal once they have cooled. It also simplifies cleanup, as any residue can be wiped away easily.
Spatula and Wire Rack
A spatula is essential for spreading the batter evenly in the baking pan and for transferring the baked cookie bars to a cooling rack. A wire rack is important for cooling the bars evenly, as it allows air to circulate around them, preventing sogginess. Cooling the bars properly will help achieve the desired texture and flavor.
Step-by-Step Baking Instructions
Now that you have a solid understanding of the ingredients and equipment needed, it’s time to get started on your Chocolate Heaven Cookie Bars! Follow these step-by-step instructions to create your own batch of heavenly treats:
1. Preheat the Oven: Begin by preheating your oven to 350°F (175°C). This ensures that the bars bake evenly and reach the desired texture.
2. Prepare the Baking Pan: Line your 9×13 inch baking pan with parchment paper, leaving a slight overhang on the sides for easy removal. This will help the bars lift out of the pan without breaking.
3. Mix Dry Ingredients: In a medium-sized mixing bowl, whisk together the all-purpose flour, baking soda, and salt. This step ensures that the leavening agent is evenly distributed throughout the flour.
4. Cream Butter and Sugars: In a large mixing bowl, use an electric mixer to cream together the softened unsalted butter, granulated sugar, and brown sugar until the mixture is light and fluffy. This process typically takes about 2-3 minutes.
5. Add Eggs and Vanilla: Beat in the eggs, one at a time, ensuring each egg is fully incorporated before adding the next. Then, mix in the vanilla extract until evenly combined.
6. Combine Dry and Wet Ingredients: Gradually add the dry ingredient mixture to the wet ingredients, mixing on low speed until just combined. Be careful not to overmix, as this can lead to tough cookie bars.
7. Fold in Chocolate Chips and Nuts: Carefully fold in the chocolate chips and any chopped nuts, ensuring they are evenly distributed throughout the batter.
8. Spread the Batter: Using a spatula, spread the cookie dough evenly into the prepared baking pan. Smooth the top to create an even layer.
9. Bake: Place the baking pan in the preheated oven and bake for 25-30 minutes, or until the edges are golden brown, and a toothpick inserted in the center comes out with a few moist crumbs.
10. Cool: Once baked, remove the pan from the oven and allow the cookie bars to cool in the pan for about 10 minutes. Then, use the parchment paper to lift the bars out of the pan and onto a wire rack to cool completely.
This is just the beginning of your journey to creating Chocolate Heaven Cookie Bars. As you progress through the recipe, you’ll discover the wonderful aroma that fills your kitchen and the anticipation that builds as you await the moment you can take your first bite. Stay tuned for the next part of the article, where we will delve into tips for achieving the best results and answer some common questions about these delectable cookie bars!
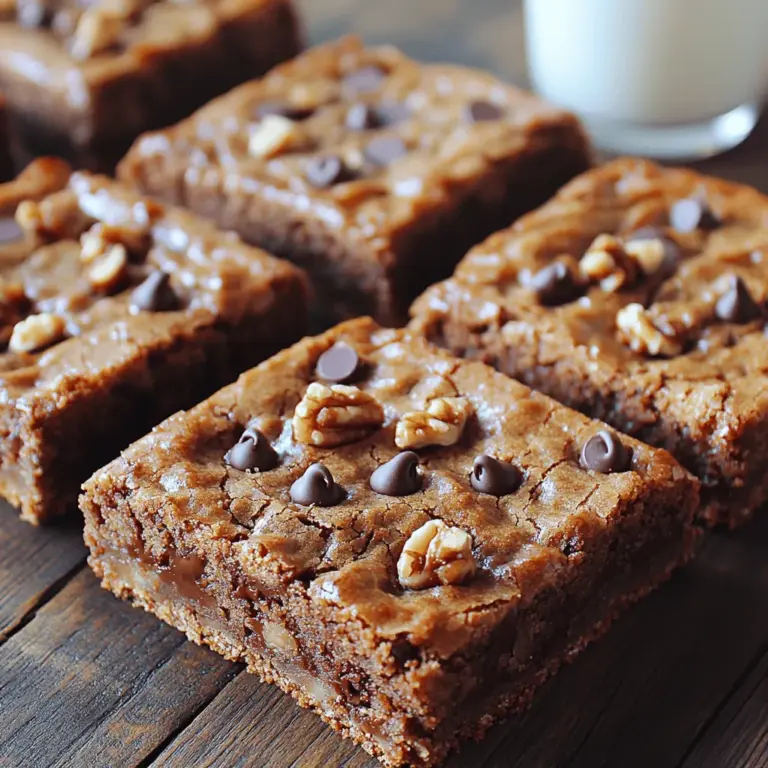
{{image_2}}
Baking Process Breakdown
Preheating the Oven
One of the most crucial steps in baking Chocolate Heaven Cookie Bars is preheating your oven. An adequately heated oven ensures even baking, allowing your cookie bars to rise beautifully and develop that perfect golden crust. Set your oven temperature to 350°F (175°C) at least 15 minutes before you plan to bake. This allows the heat to distribute evenly throughout the oven, preventing any cold spots that could lead to uneven baking.
Mixing Dry Ingredients
To achieve a uniform mixture of dry ingredients, start by sifting together your flour, baking soda, and salt. Sifting not only helps remove lumps but also aerates the flour, which is essential for creating light and fluffy cookie bars. Once sifted, whisk the dry ingredients together in a large bowl to ensure they are evenly distributed. This step is vital because it guarantees that the leavening agent (baking soda) is evenly mixed throughout, leading to consistent results in every bite.
Creaming Butter and Sugars
The creaming process is where the magic begins. Use room temperature butter, as it incorporates air effectively when whipped with sugars. In a stand mixer or large bowl, beat the butter with both granulated and brown sugars until the mixture is light and fluffy, usually about 3-5 minutes. This step is essential as it helps to create a texture that is both tender and chewy. You’re aiming for a pale yellow color, which indicates that enough air has been whipped into the butter mixture.
Incorporating Eggs and Vanilla
When adding eggs to your batter, do so one at a time. This method allows each egg to be fully incorporated before the next one is added, leading to a smoother batter. Additionally, adding vanilla extract during this stage enhances the flavor profile of your cookie bars. Mix until the eggs are just combined; overmixing at this stage can lead to denser bars.
Combining Wet and Dry Ingredients
Now it’s time to bring your wet and dry mixtures together. Gently fold the dry ingredients into the wet mixture using a spatula or wooden spoon. Be cautious not to overmix; this can activate the gluten in the flour, resulting in tough cookie bars. Instead, mix until just combined. A few streaks of flour are acceptable, as it will incorporate further when you add the chocolate chips.
Folding in Chocolate Chips and Nuts
For an even distribution of chocolate chips and nuts, use the folding technique. This entails gently turning the batter over onto itself rather than stirring aggressively. This method helps maintain the lightness of the mixture while ensuring that the chocolate and nuts are evenly spread throughout the batter, providing a delightful bite every time.
Baking and Cooling
Once your batter is ready, spread it evenly in your prepared baking pan. Bake in your preheated oven for 25-30 minutes. To check for doneness, insert a toothpick into the center; it should come out with a few moist crumbs but not wet batter. After removing the cookie bars from the oven, allow them to cool in the pan for about 10-15 minutes. Then, transfer them to a wire rack to cool completely. This step prevents them from becoming soggy and helps maintain the ideal texture.
Serving Suggestions and Presentation Ideas
Serving Temperature
Chocolate Heaven Cookie Bars can be enjoyed warm or at room temperature. When served warm, the chocolate chips are gooey and melt in your mouth, providing a rich experience. Room temperature bars, on the other hand, have a firmer texture, allowing for easier slicing and serving. The flavor profile remains rich regardless of temperature, but many find that warmth enhances the chocolatey goodness.
Pairing Options
To elevate your cookie bar experience, consider pairing them with beverages that complement their sweetness. A glass of cold milk is a classic choice, enhancing the chocolate flavor and providing a creamy contrast. For a more adult pairing, consider a rich coffee or espresso that balances the sweetness of the bars. Tea lovers might enjoy a robust black tea or a soothing chai latte, both of which offer comforting warmth.
Presentation Tips
To present your cookie bars beautifully, consider cutting them into uniform squares or rectangles and arranging them on a decorative platter. Dusting the top with powdered sugar or cocoa powder can add an elegant touch. You might also consider garnishing with a drizzle of melted chocolate or a sprinkle of sea salt for added flavor and visual appeal. For special occasions, serve them with a scoop of vanilla ice cream or whipped cream on the side.
Nutritional Information and Variations
Serving Size and Nutritional Breakdown
Each serving of Chocolate Heaven Cookie Bars typically contains around 200 calories, depending on the specific ingredients used. The bars are not just a treat; they provide a balanced mix of macronutrients. Each bar contains approximately 8g of fat, 30g of carbohydrates, and 2g of protein. These numbers can vary based on the specific brands of ingredients chosen and any variations made to the recipe.
Possible Variations
For those looking to modify the recipe, there are plenty of options. To create a gluten-free version, substitute regular flour with a gluten-free flour blend. You can also experiment with different types of chocolate, such as dark chocolate or white chocolate chips, for a unique twist on flavor. For nut allergies, simply omit the nuts or replace them with seeds like sunflower or pumpkin seeds. Additionally, adding a teaspoon of instant coffee granules can intensify the chocolate flavor, making every bite even more indulgent.
Conclusion: The Joy of Baking and Sharing
Baking is more than just a process; it’s an opportunity to create something delicious and share it with those we love. Chocolate Heaven Cookie Bars are a perfect example of a treat that brings people together, whether at a family gathering, a cozy night in, or as a thoughtful gift for a friend. The joy of baking these bars extends beyond the kitchen; it’s about the moments shared around the table, the smiles that follow each bite, and the warmth they bring to any occasion.
So, embrace the process of creating these decadent cookie bars, and don’t forget to share the love (and the cookies) with family and friends. Happy baking!