Introduction
If you’re on the lookout for a decadent dessert that combines creamy goodness with the nostalgic crunch of chocolate, the Kit Kat Cheesecake Delight is your answer. This unique dessert brings together the rich, velvety texture of cream cheese with the irresistible flavor of Kit Kat bars, creating a cheesecake that is both indulgent and memorable. Perfect for special occasions or casual gatherings, this cheesecake not only satisfies your sweet tooth but also serves as a conversation starter among friends and family.
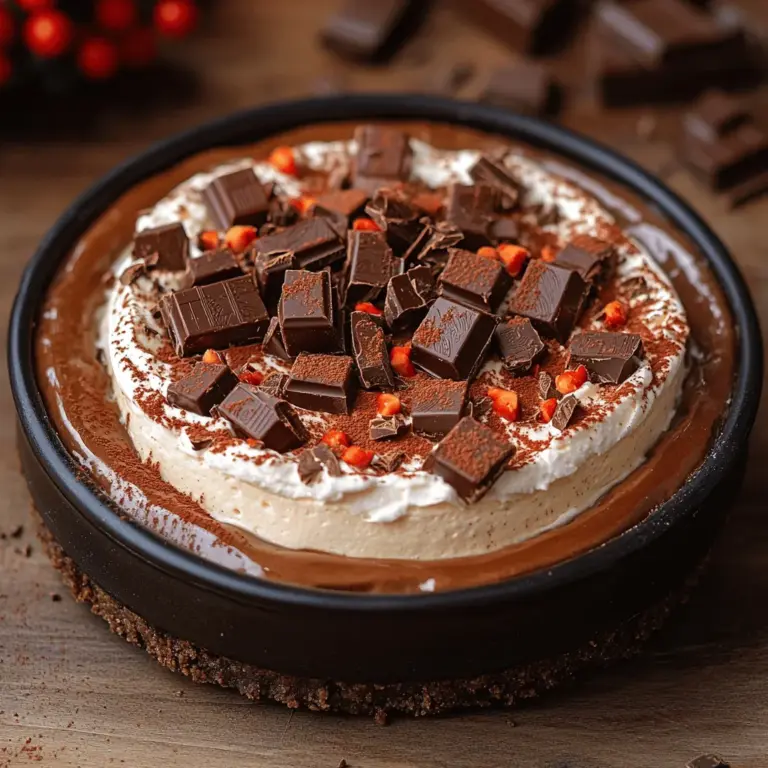
Imagine slicing into a rich cheesecake adorned with crispy Kit Kat pieces, revealing a creamy interior that melts in your mouth. The combination of flavors and textures is nothing short of divine, making it a must-try for cheesecake lovers and chocolate enthusiasts alike. Whether you’re celebrating a birthday, hosting a dinner party, or simply treating yourself, this Kit Kat Cheesecake Delight is sure to impress.
The Allure of Cheesecake
Cheesecake has a storied history that dates back to ancient Greece, where it was first served to athletes during the Olympic Games as a source of energy. Over the centuries, cheesecake has evolved, taking on various forms and flavors across cultures. From the classic New York-style cheesecake to the light and airy Japanese soufflé cheesecake, this dessert has captured hearts worldwide.
In the United States, cheesecake gained immense popularity in the 19th century, thanks in part to the introduction of cream cheese as a primary ingredient. Today, it remains a favorite dessert for many, celebrated for its versatility. Cheesecakes can be baked or unbaked, flavored with fruits, chocolate, or caramel, and topped with an array of garnishes. The creamy texture and customizable nature of cheesecake allow it to fit into any occasion, from a simple dinner to a grand celebration.
Why Choose Kit Kat Cheesecake Delight?
The Kit Kat Cheesecake Delight stands out not only for its flavor but also for its unique ingredients. This cheesecake is a delightful fusion of classic cheesecake elements and the beloved Kit Kat bars. The nostalgic appeal of Kit Kat bars, with their crunchy wafers coated in smooth chocolate, adds a special twist that elevates the traditional cheesecake experience.
What makes this dessert particularly enticing is the perfect balance of flavors and textures. The creamy filling, enhanced by the richness of cream cheese and sour cream, contrasts beautifully with the crispy Kit Kat pieces sprinkled throughout. The chocolate sandwich cookie crust provides a delightful crunch, setting the stage for the creamy decadence above. This cheesecake is not just a dessert; it’s an experience that tantalizes the taste buds and brings back fond memories of childhood treats.
Ingredients Breakdown
To create the Kit Kat Cheesecake Delight, you’ll need a handful of simple yet essential ingredients, each playing a crucial role in the final product. Here’s a detailed breakdown of each ingredient and its purpose:
– Chocolate Sandwich Cookie Crumbs: These crumbs form the crust of the cheesecake, providing a crunchy texture that contrasts perfectly with the creamy filling. You can use any chocolate sandwich cookies, but Oreos are a popular choice.
– Unsalted Butter: Melted unsalted butter is used to bind the cookie crumbs together, ensuring a cohesive crust that holds its shape once baked.
– Cream Cheese: The star of the filling, cream cheese gives the cheesecake its rich and creamy texture. It’s important to use full-fat cream cheese for the best results.
– Granulated Sugar: Sugar sweetens the cheesecake, balancing the richness of the cream cheese and enhancing the overall flavor.
– Vanilla Extract: A splash of vanilla extract elevates the cheesecake’s flavor profile, adding a warm, aromatic note that complements the chocolate.
– Eggs: Eggs contribute to the richness and structure of the cheesecake, helping it to set properly without becoming overly dense.
– Sour Cream: Sour cream adds a creamy texture and slight tang that helps cut through the sweetness, making each bite perfectly balanced.
– Heavy Whipping Cream: This ingredient is used for the whipped topping, adding lightness and a luscious finish to the cheesecake.
– Kit Kat Bars: The highlight of this recipe, Kit Kat bars are chopped and folded into the cheesecake mixture, delivering that iconic chocolate and wafer crunch.
– Cocoa Powder: While primarily used for decoration, cocoa powder adds a visual appeal, creating a beautiful contrast against the creamy cheesecake.
Step-by-Step Guide to Making Kit Kat Cheesecake Delight
Preparing the Crust
1. Preheat the Oven: Start by preheating your oven to 325°F (163°C). This ensures that your cheesecake cooks evenly and sets properly.
2. Prepare the Cookie Crust: In a mixing bowl, combine 2 cups of chocolate sandwich cookie crumbs with 1/2 cup of melted unsalted butter. Stir until the mixture resembles wet sand.
3. Press the Mixture into a Springform Pan: Grease a 9-inch springform pan with a little butter or non-stick spray. Transfer the cookie mixture into the pan and press it firmly into the bottom and slightly up the sides to create an even crust. Use the back of a measuring cup for a smooth and compact finish.
4. Bake the Crust: Place the crust in the preheated oven for about 10 minutes, just until set. This step helps to create a sturdy base for your cheesecake. Once baked, remove the crust from the oven and let it cool while you prepare the filling.
5. Chill the Crust: To achieve the perfect cheesecake texture, it’s essential to chill the crust for at least 15 minutes before adding the filling. This cooling period allows the butter to harden and the crust to maintain its shape.
With the crust prepared, you’re ready to move on to making the creamy filling that will take your Kit Kat Cheesecake Delight to the next level. In the following sections, we’ll guide you through the steps to create the luscious filling and assemble this delightful dessert. Get ready to indulge in a sweet experience that will leave you and your guests yearning for more!
{{image_2}}
Instructions for Mixing and Pressing the Crust into the Springform Pan
To start your Kit Kat Cheesecake Delight, the first step involves preparing the crust. In a medium-sized bowl, combine the crushed graham crackers, granulated sugar, and melted butter. Mix until the texture resembles wet sand. This combination is crucial as it will form the base of your cheesecake, providing a nice contrast to the creamy filling above.
Once mixed, pour the crust mixture into a 9-inch springform pan. Using the back of a measuring cup or your fingers, firmly press the mixture into the bottom and slightly up the sides of the pan. Ensure the crust is evenly distributed to avoid any weak spots that could compromise the structure of your cheesecake during baking.
Importance of Baking the Crust for Texture
Baking the crust is an essential step that contributes significantly to the overall texture of the cheesecake. By pre-baking the crust at 350°F (175°C) for about 10 minutes, you allow it to set and develop a slight golden color. This not only enhances the flavor but also helps to create a sturdier base that can support the creamy filling without becoming soggy. After baking, let the crust cool while you prepare the filling.
Making the Creamy Filling
Now that the crust is prepared, it’s time to dive into the creamy filling, which is the highlight of your Kit Kat Cheesecake Delight. Begin by placing the softened cream cheese in a large mixing bowl. Using an electric mixer, beat the cream cheese on medium speed until it becomes smooth and creamy. This step is vital for ensuring there are no lumps in your filling, resulting in a velvety cheesecake.
Techniques for Achieving a Smooth Cream Cheese Mixture
To achieve a smooth cream cheese mixture, it’s essential to start with room temperature cream cheese. Cold cream cheese can lead to lumps that are difficult to break down, even with vigorous mixing. If you forget to set it out in advance, you can cut the cream cheese into small cubes and microwave it for about 10-15 seconds, just until it softens slightly.
The Significance of Room Temperature Ingredients for Optimal Blending
In addition to the cream cheese, all other ingredients should also be at room temperature. This includes sour cream and eggs. Room temperature ingredients blend more easily, which contributes to a smooth, creamy texture and prevents overmixing, which can introduce too much air into the batter.
Incorporating the Eggs and Sour Cream
Once your cream cheese mixture is smooth, it’s time to add the eggs. Crack the eggs into a separate bowl to avoid any shell fragments, then add them one at a time to the cream cheese mixture. Mix gently after each addition until just combined.
Tips on Adding Eggs Without Overmixing
Be cautious not to overmix after adding the eggs; overmixing can lead to a cheesecake that puffs up and then collapses, resulting in cracks. Mix just until the eggs are incorporated, and then add the sour cream. The sour cream adds a delightful tanginess and enhances the overall creaminess of the cheesecake.
The Role of Sour Cream in Enhancing Creaminess
Sour cream not only contributes to the flavor profile but also helps achieve a smooth, rich texture that complements the sweetness of the Kit Kat bars. Fold it into the batter until fully incorporated, ensuring the mixture is well-blended but not overworked.
Adding the Kit Kat Bars
Now, it’s time for the star of the show—Kit Kat bars! Take your chopped Kit Kats and fold them into the cream cheese mixture.
Best Practices for Chopping and Incorporating Kit Kat Pieces Evenly
To achieve the best results, chop the Kit Kat bars into small, even pieces. This ensures that every slice of cheesecake has a bit of that crunchy chocolate goodness. Use a sharp knife to cut the bars, and then gently fold the pieces into the mixture with a spatula. This step should be done carefully to maintain the integrity of the Kit Kat pieces.
Baking the Cheesecake
With the filling ready, pour it into your pre-baked crust. Smooth the top with a spatula for an even finish.
Importance of Monitoring Baking Times for Perfect Texture
Bake the cheesecake in a preheated oven at 325°F (160°C) for about 50-60 minutes. The cheesecake is done when the edges are set, but the center still has a slight jiggle. It will continue to cook as it cools, so avoid overbaking to ensure a creamy texture.
Discussing the Cooling Process in the Oven to Prevent Cracks
To prevent cracks from forming on the surface of your cheesecake, turn off the oven once the baking time is complete and leave the cheesecake inside with the door slightly ajar for about one hour. This gradual cooling process helps minimize temperature shock and keeps the cheesecake from cracking.
Chilling the Cheesecake
After the initial cooling in the oven, remove the cheesecake and let it cool to room temperature on the counter. Once cooled, cover it with plastic wrap and refrigerate for at least 4 hours, but preferably overnight.
Explanation of Why Chilling is Crucial for Flavor Development and Texture
Chilling is crucial for flavor development, allowing the ingredients to meld together beautifully. Additionally, a well-chilled cheesecake will slice more cleanly, providing clean edges for a beautiful presentation.
Creating the Perfect Whipped Cream Topping
While your cheesecake is chilling, you can prepare the whipped cream topping. In a chilled mixing bowl, pour in heavy whipping cream and add powdered sugar and vanilla extract.
Step-by-Step Instructions on Whipping the Cream
1. Start mixing on low speed to prevent splatter, then gradually increase to medium-high speed.
2. Whip until soft peaks form, which should take about 3-5 minutes.
3. Be careful not to over-whip, as this can lead to a grainy texture or even butter.
Tips for Achieving the Right Consistency
For the perfect consistency, stop whipping when soft peaks form, and give it a test. When you lift the beaters, the cream should hold its shape without collapsing.
Ideas for Decorating with Whipped Cream and Additional Toppings
Once your cheesecake is chilled and ready to serve, spread the whipped cream over the top or pipe it decoratively around the edges. For a visual treat, consider adding more chopped Kit Kat pieces or drizzling melted chocolate on top for an extra indulgent finish.
Serving Suggestions
When it comes to serving your Kit Kat Cheesecake Delight, presentation is key.
Recommendations for Presenting the Cheesecake
Slice the cheesecake using a sharp knife dipped in hot water for clean cuts. Transfer each slice to a plate, and garnish with a dollop of whipped cream and additional Kit Kat pieces for a beautiful presentation.
Suggestions for Pairing with Beverages
Pair this decadent dessert with a rich cup of coffee or a sweet dessert wine. The bitterness of coffee complements the sweetness of the cheesecake, while dessert wines can enhance the chocolate flavors.
Ideas for Garnishing to Elevate the Presentation
Consider garnishing with fresh berries or a drizzle of caramel sauce to add color and flavor contrast. A sprinkle of cocoa powder or chocolate shavings can also elevate the visual appeal and add a touch of elegance.
Conclusion
In summary, making a Kit Kat Cheesecake Delight is not only a rewarding experience but also a delightful treat that will impress family and friends alike. The combination of creamy cheesecake, crunchy Kit Kat bars, and a buttery crust makes for a truly indulgent dessert.
As you prepare this cheesecake, remember that the joy of baking lies not just in the final product but in the process itself. So, gather your loved ones, share this recipe, and create memorable gatherings around the table. Embrace the joy of creating delicious desserts at home, and let every bite of this cheesecake bring you happiness and satisfaction. Enjoy your Kit Kat Cheesecake Delight and the sweet moments that come with it!
