Spooky Halloween Candy Bark Recipe
As Halloween approaches, homes are transformed into haunted havens, and families gather to celebrate with spooky decorations, thrilling costumes, and of course, delightful treats. Halloween is more than just a day for trick-or-treating; it’s an opportunity to create memorable experiences through themed foods that bring joy and excitement, especially for children. Among the myriad of festive recipes, the Spooky Halloween Candy Bark stands out as a fun, colorful, and easy-to-make treat that will add a special touch to any Halloween gathering.
Candy bark is a beloved dessert that has gained immense popularity during the holiday season due to its simplicity and versatility. This sweet treat allows for endless customization, making it perfect for any occasion, particularly Halloween. With its vibrant colors and playful toppings, Spooky Halloween Candy Bark not only satisfies a sweet tooth but also serves as a centerpiece for festive celebrations. The process of making candy bark is straightforward and can be a fun activity to engage the whole family, ensuring that everyone has a hand in creating something special.
Understanding Candy Bark
Candy bark is essentially a confection made from melted chocolate that is spread out and topped with various goodies, then allowed to harden before being broken into pieces. This delightful treat has roots that can be traced back to simpler chocolate creations, but it has since evolved into a canvas for culinary creativity. Its flexibility and ease of preparation make it an ideal choice for holiday festivities, especially for those looking to whip up something that looks impressive without requiring advanced baking skills.
During holidays and special occasions, candy bark becomes a staple dessert, often adorned with seasonal toppings that reflect the theme of the celebration. Its popularity stems from the joyful experience of combining different flavors, textures, and colors, making it appealing to both children and adults alike. The Spooky Halloween Candy Bark can be tailored to suit personal tastes and preferences, allowing for a unique twist on the traditional recipe. Whether you prefer sweet, savory, or a mix of both, the possibilities are endless.
Ingredients Breakdown
To create the perfect Spooky Halloween Candy Bark, it’s essential to start with quality ingredients. The primary components of this recipe are dark chocolate and white chocolate, which not only provide a rich and creamy base but also serve as a beautiful backdrop for the vibrant toppings. Dark chocolate brings a deep, robust flavor that contrasts beautifully with the sweetness of white chocolate, creating a balanced treat that is both satisfying and indulgent.
When choosing chocolate, opt for high-quality options to enhance the overall flavor profile of your candy bark. Quality chocolate not only melts better, making it easier to work with, but it also contributes to a more enjoyable taste experience.
The fun toppings are what truly make this candy bark stand out. Each ingredient adds its own unique flavor and texture, ensuring that every bite is a delightful surprise:
– Candy Corn: This classic Halloween treat is synonymous with the season. Its bright colors and sweet, chewy texture make it a perfect addition to the bark, evoking the spirit of Halloween in every piece.
– Mini Marshmallows: Adding a soft, fluffy texture, mini marshmallows bring an element of sweetness that complements the rich chocolate base. They also create a fun visual contrast against the darker chocolate.
– Crushed Oreos: For those who love an extra chocolatey kick, crushed Oreos enhance the flavor profile while adding a crunchy texture. Their dark, cream-filled goodness takes the bark to a whole new level.
– Halloween-themed Sprinkles: Sprinkles are essential for adding a festive touch. Whether shaped like bats, pumpkins, or ghosts, these colorful decorations not only enhance the visual appeal of the candy bark but also celebrate the Halloween theme.
– Salted Pumpkin Seeds: For a twist of savory goodness, salted pumpkin seeds introduce a crunchy element that balances the sweetness of the chocolate and candy corn. Their nutty flavor pairs wonderfully with the other ingredients.
– Optional Edible Glitter: If you want to add an extra magical touch, consider using edible glitter. This simple addition can transform your candy bark into a shimmering delight that catches the eye and adds to the festive atmosphere.
Preparation Steps
Creating your Spooky Halloween Candy Bark is a straightforward process that anyone can master, regardless of their baking experience. Here’s how to get started:
1. Gather Your Ingredients: Before diving into the preparation, make sure you have all your ingredients on hand. This includes your dark chocolate, white chocolate, candy corn, mini marshmallows, crushed Oreos, Halloween-themed sprinkles, salted pumpkin seeds, and optional edible glitter.
2. Prepare Your Workspace: Line a baking sheet with parchment paper to prevent sticking and ensure easy removal once the candy bark has set. This step is crucial for achieving a clean presentation.
3. Melt the Chocolate: Begin by melting the dark chocolate. This can be done using a microwave or a double boiler. If using a microwave, heat in 30-second intervals, stirring in between to prevent overheating. Once the dark chocolate is completely melted and smooth, pour it onto the prepared baking sheet and spread it into an even layer.
4. Add the White Chocolate Layer: Next, melt the white chocolate using the same method as before. Once melted, drizzle the white chocolate over the dark chocolate layer. You can use a spatula or the back of a spoon to swirl the two chocolates together for a marbled effect.
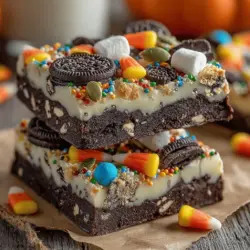
5. Incorporate the Toppings: While the chocolate is still warm, generously sprinkle the candy corn, mini marshmallows, crushed Oreos, Halloween-themed sprinkles, and salted pumpkin seeds over the top. If you’re using edible glitter, sprinkle it on last to ensure it adheres to the chocolate.
By following these steps, you will create a visually stunning and delicious Spooky Halloween Candy Bark that is sure to impress your family and friends. The combination of flavors and textures will make this treat a highlight of your Halloween festivities, bringing smiles and delight to everyone who indulges in it.
{{image_2}}
Detailed Description of Each Step in the Recipe
Preparing the Baking Sheet
Before you dive into the delicious world of Halloween candy bark, it’s essential to set the stage for a hassle-free experience. Start by preparing your baking sheet. Line it with parchment paper, ensuring that the paper hangs slightly over the edges. This step is crucial because it allows for easy removal of the candy bark once it has set. The parchment prevents the chocolate from sticking, which can be a real headache during cleanup. Plus, the overhang will give you a handy way to lift the entire sheet of bark out for cutting later.
Melting Techniques for Dark and White Chocolate
Achieving the perfect consistency of melted chocolate is a pivotal part of making candy bark. Here are two effective melting techniques you can use:
1. Double Boiler Method: Fill a saucepan with a couple of inches of water and bring it to a simmer. Place a heatproof bowl on top, ensuring that it doesn’t touch the water. Add your chopped dark chocolate or white chocolate to the bowl and stir gently until melted and smooth. This method allows for gentle heating, reducing the risk of burning the chocolate.
2. Microwave Method: If you’re short on time, the microwave is your best friend. Place your chocolate in a microwave-safe bowl and heat it in 30-second intervals, stirring in between. This ensures even melting and prevents scorching. Generally, it takes about 1-2 minutes, depending on your microwave’s power.
Regardless of the method you choose, be sure to stir the chocolate until it is completely smooth and free of lumps. The ideal consistency should be fluid and glossy—perfect for spreading.
Layering Techniques
Once you have your melted chocolate, it’s time to create that beautiful layered effect. Start with the dark chocolate as your base layer. Pour it onto the prepared baking sheet and use a spatula to spread it evenly, making sure it reaches all corners. Allow this layer to cool slightly but not harden completely—this is important for the adherence of the white chocolate layer.
Next, melt your white chocolate using the same technique. Once melted, carefully pour it over the dark chocolate layer. Use a spatula to swirl the two chocolates together for a marbled effect or simply spread the white chocolate on top for a cleaner look. The contrast between the dark and white chocolate not only adds visual appeal but also creates a delightful flavor combination that is sure to impress.
Timing for Adding Toppings
Timing is crucial when adding toppings to your candy bark. After layering the chocolates, sprinkle your chosen toppings—such as Halloween-themed candies, sprinkles, or pretzel pieces—onto the melted chocolate while it’s still wet. This ensures that the toppings adhere properly. If you wait too long, the chocolate will set, and your toppings won’t stick, leading to a less appealing bark.
Feel free to get creative with your toppings! Think of gummy worms, candy eyeballs, or crushed graham crackers to mimic dirt. The possibilities are endless!
Chilling the Bark
Chilling the bark is essential for achieving the right texture and ensuring it sets properly. Once you’ve added your toppings, place the baking sheet in the refrigerator for about 30 minutes or until the chocolate has completely hardened. Avoid placing it in the freezer, as this can lead to condensation and a less-than-perfect texture. The goal here is to have a firm yet slightly soft bite that melts in your mouth when you eat it.
Breaking the Bark into Pieces
Once your candy bark has set, it’s time to break it into pieces. For a rustic, irregular look, use your hands to snap the bark into chunks. If you prefer more uniform pieces, you can use a sharp knife to cut through the chocolate. Keep in mind that the best pieces will have a mix of both dark and white chocolate with toppings included, so don’t stress too much about the size or shape.
Creative Variations
Suggestions for Customizing the Halloween Candy Bark
One of the best things about candy bark is its versatility. Here are some creative variations to inspire your Halloween candy bark:
– Alternative Chocolates: While dark and white chocolate are classic choices, consider using milk chocolate, caramel-flavored chocolate, or even colored candy melts for a festive touch. Each type of chocolate will lend a unique flavor and visual appeal to your bark.
– Different Toppings: Get playful with your toppings. Instead of just candies, try adding nuts, dried fruits, or even crushed cookies. For a spooky effect, consider using themed candies like gummy spiders or mini chocolate skulls. Tailoring your toppings to match different themes can elevate your candy bark to the next level.
– Seasonal Adaptations: The joy of candy bark isn’t limited to Halloween. You can adapt this recipe for other holidays too. For Christmas, consider using peppermint candies and red and green sprinkles. For Easter, pastel-colored chocolates and bunny-shaped candies can brighten up your bark.
Storage and Serving Suggestions
Best Practices for Storing Candy Bark
To maintain the freshness and quality of your candy bark, store it in an airtight container at room temperature. If you live in a particularly warm climate, consider refrigerating it, but allow it to come to room temperature before serving to ensure the best flavor and texture. Properly stored, your candy bark can last for up to two weeks—if it lasts that long!
Ideas for Serving Candy Bark at Halloween Parties
Candy bark makes for an impressive and festive treat at Halloween gatherings. Here are some serving suggestions to wow your guests:
– Creative Plating Options: Arrange the broken pieces of candy bark on a large platter or tiered serving tray. You can even place it in a decorative bowl lined with Halloween-themed tissue paper for an eye-catching display.
– Presentation Tips: Consider dusting your candy bark with edible glitter or serving it with themed cake stands and decorative plates. Adding small pumpkins or other Halloween decorations surrounding your serving dish can enhance the festive atmosphere.
– Pairing Suggestions: Elevate your candy bark experience by pairing it with beverages such as hot apple cider, pumpkin spice lattes, or even spooky cocktails. You could also serve it alongside other Halloween-themed snacks, such as caramel popcorn or themed cupcakes for a complete dessert table.
Conclusion
Spooky Halloween Candy Bark is not just a treat; it’s a delightful addition to your Halloween festivities that brings joy to both the maker and the eater. With its striking appearance, delicious flavors, and endless customization options, this candy bark is sure to be a hit at any gathering.
So gather your ingredients, unleash your creativity, and don’t be afraid to experiment with flavors and presentations. Remember, the most enjoyable part of making themed treats is sharing them with loved ones, fostering connection and celebration during special occasions. Get ready to create memories that will last long after the last piece of bark has been devoured!