Colorful Crunchy Back-to-School Snack Bars: A Nutritious Treat for Kids
As the back-to-school season approaches, parents often seek ways to ensure their children are equipped with healthy snacks that can keep their energy levels up throughout the day. The right snack not only provides the necessary nutrients but also helps maintain focus and concentration during classes. With busy schedules and the temptation of sugary snacks, finding a quick and nutritious solution can be challenging. That’s where our Colorful Crunchy Back-to-School Snack Bars come into play. This recipe offers a delightful combination of flavors and textures, making snack time something to look forward to.
These snack bars are not only easy to make but also utilize vibrant ingredients that appeal to children, turning an ordinary treat into a fun and exciting experience. Packed with wholesome ingredients that cater to a child’s nutritional needs, these bars are the perfect solution for parents looking to provide a healthy snack option that kids will actually enjoy.
Understanding the Ingredients
To appreciate the goodness of our Colorful Crunchy Back-to-School Snack Bars, it’s essential to understand the nutritional benefits of each ingredient involved. Here’s a closer look at the main components that make this recipe both delicious and healthy.
Rolled Oats
Rolled oats serve as the foundational ingredient for these snack bars. They are rich in soluble fiber, which aids digestion and helps maintain stable blood sugar levels. Additionally, oats are a great source of complex carbohydrates, providing sustained energy—a perfect choice for busy school days. Their chewy texture also contributes to the overall mouthfeel of the bars, making them satisfying to eat.
Crispy Rice Cereal
Adding a light and airy crunch, crispy rice cereal enhances the texture of the snack bars without overwhelming them. This ingredient lightens the mixture, making the bars more appealing, especially to younger taste buds. The simplicity of crispy rice cereal also allows it to complement the other ingredients without competing for flavor, making it a key player in achieving that satisfying crunch.
Honey or Maple Syrup
For sweetness, we turn to natural sweeteners like honey or maple syrup. These ingredients not only add a pleasant flavor but also work as binding agents, helping to hold the mixture together. Honey boasts antibacterial properties and is a source of quick energy, while maple syrup is known for its rich flavor and mineral content. Both options are healthier alternatives to refined sugars, making them ideal for kids.
Peanut Butter (or Almond Butter)
Nut butter is a powerhouse ingredient that delivers protein, healthy fats, and essential vitamins. Peanut butter, or almond butter for those with nut allergies, provides a creamy texture that enhances the bars’ richness. Protein is crucial for growing children, supporting muscle development and overall health. The added flavor of nut butter also elevates the taste profile of the bars, making them more indulgent.
Cocoa Powder
To add a touch of chocolatey goodness, cocoa powder is incorporated into the mix. This ingredient not only enhances the flavor but also offers various health benefits, including antioxidants that can improve heart health and brain function. Cocoa powder provides a deeper richness that can satisfy chocolate cravings without the added sugars found in many candy bars.
Mini Chocolate Chips
Every kid loves a little chocolate, and that’s where mini chocolate chips come in. They add a delightful surprise in every bite, making these snack bars more enticing for young ones. While they do contribute some sugar, using them in moderation keeps the overall recipe balanced.
Dried Fruit
For additional sweetness and a chewy texture, dried fruit such as raisins, cranberries, or apricots can be mixed in. Dried fruits are excellent sources of fiber, vitamins, and natural sugars, providing an energy boost while also helping with digestion. They add a pop of color to the bars, making them visually appealing to kids.
Nuts
Incorporating nuts into the snack bars not only adds a satisfying crunch but also boosts the nutritional profile. Nuts are packed with healthy fats, protein, and essential minerals. Options like almonds, walnuts, or pecans can enhance the flavor and provide a variety of textures, making each bar a unique experience.
Vanilla Extract and Sea Salt
Finally, a splash of vanilla extract and a pinch of sea salt can enhance the overall flavor of the bars. Vanilla adds a warm sweetness that complements the other ingredients, while sea salt balances the sweetness, making every bite delicious.
Preparation Steps Explained
Now that we’ve explored the nutritional benefits of each ingredient, let’s dive into the preparation steps to create these Colorful Crunchy Back-to-School Snack Bars.
Step 1: Preparing the Baking Pan
Begin by preparing your baking pan. This is a crucial step to ensure that the bars can be easily removed once they are set. Line an 8-inch square baking pan with parchment paper, allowing some overhang for easy lifting. Lightly grease the parchment with a bit of oil or cooking spray to prevent the mixture from sticking.
Step 2: Mixing Dry Ingredients
In a large mixing bowl, combine the rolled oats, crispy rice cereal, cocoa powder, and any nuts or dried fruit you plan to use. Mix these dry ingredients together thoroughly to ensure an even distribution of flavors and textures. This step is essential for achieving a balanced taste in every bite, so take your time to mix well.
Step 3: Combining Wet Ingredients
In a separate saucepan, gently heat the peanut butter (or almond butter), honey (or maple syrup), and vanilla extract over low heat. Stir continuously until the mixture is smooth and well-combined. Heating the ingredients helps to create a more fluid texture, making it easier to mix with the dry ingredients later on.
Step 4: Merging Wet and Dry Ingredients
Once the wet mixture is smooth, pour it over the dry ingredients. Use a spatula or wooden spoon to mix the two components together. The goal is to ensure that all the dry ingredients are evenly coated with the wet mixture, creating a sticky clump. This step is crucial for ensuring the bars hold together after they are set.
Step 5: Setting the Mixture
Transfer the mixture into the prepared baking pan. Using your hands or the back of a spatula, press the mixture firmly into the pan. This step is vital; if the mixture is not pressed down firmly enough, the bars may crumble when cut. Aim for an even layer, ensuring the mixture reaches all corners of the pan.
Step 6: Chilling Process
Once the mixture is firmly packed, place the pan in the refrigerator for at least 1-2 hours. Chilling is essential for helping the bars firm up and hold their shape. The cold temperature allows the ingredients to bind together, resulting in a deliciously chewy and crunchy texture once cut.
By following these steps, you will be well on your way to creating a batch of Colorful Crunchy Back-to-School Snack Bars that not only delight the taste buds but also provide essential nutrients for your child’s busy day. Stay tuned for the next part of this article, where we will delve into cutting, storing, and serving these fun and nutritious snack bars!
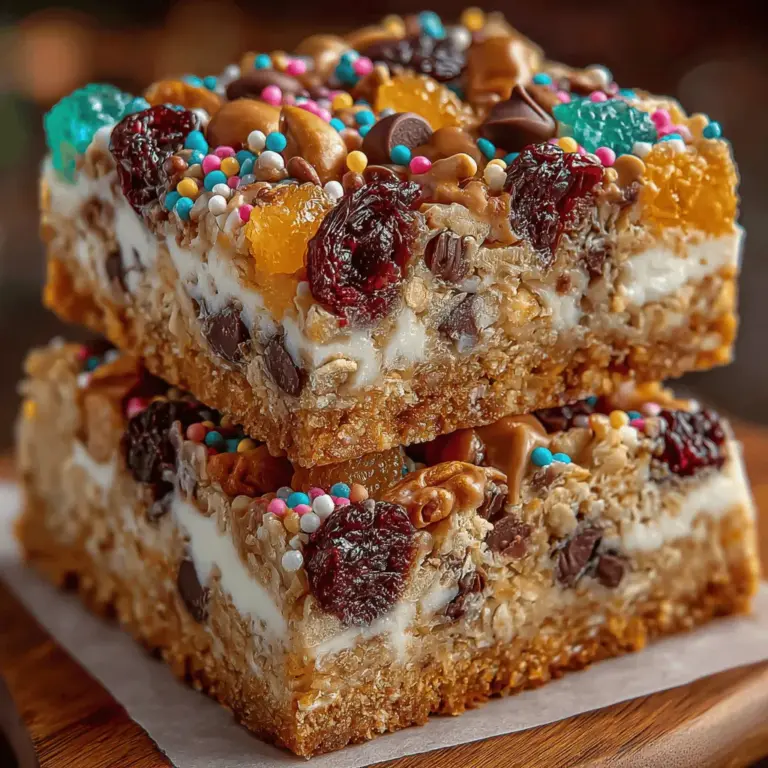
{{image_2}}
Nutritional Value Breakdown
When it comes to ensuring that our children have the energy and nutrients they need during the school day, the nutritional profile of snacks is paramount. The Colorful Crunchy Back-to-School Snack Bars are not only delicious but also packed with essential nutrients. Here’s a detailed breakdown of their nutritional content:
Caloric Content and Daily Intake
Each snack bar contains approximately 150-200 calories, depending on the specific ingredients used. This caloric range makes them an excellent choice for a mid-morning or afternoon snack. For children, the average daily caloric intake varies based on age, gender, and activity level, but generally falls between 1,600 to 2,200 calories. Therefore, these snack bars provide a manageable portion that contributes to their daily energy needs without overwhelming their diet.
Key Vitamins and Minerals
The ingredients in these bars offer a range of vitamins and minerals essential for growing kids:
– Oats: A great source of B-vitamins, which are crucial for energy metabolism and brain function.
– Nuts: Provide healthy fats, protein, and vitamin E, which supports immune function.
– Dried Fruits: Rich in fiber, vitamin C, and antioxidants that help in overall health and digestion.
– Honey or Maple Syrup: Natural sweeteners that provide quick energy while also containing trace minerals.
Comparison to Store-Bought Snack Bars
When compared to many store-bought snack bars, the Colorful Crunchy Back-to-School Snack Bars stand out nutritionally. Many commercial options are loaded with added sugars, preservatives, and unhealthy fats. In contrast, these homemade bars offer whole ingredients, allowing you to control the quality and quantity of what your kids consume. Plus, they are free from artificial additives, making them a wholesome choice for your little ones.
Creative Variations and Substitutions
One of the best aspects of the Colorful Crunchy Snack Bars is their versatility. This recipe can easily be customized to fit various dietary needs and preferences, allowing you to create a snack that your family will love.
Nut-Free Options
For families with nut allergies, you can simply omit the nuts and replace them with sunflower seeds or pumpkin seeds. These seeds are not only crunchy but also provide healthy fats and protein, ensuring that the bars still offer a satisfying texture without compromising safety.
Different Types of Dried Fruits and Nuts
To keep things exciting, consider swapping out the dried fruits and nuts based on what you have on hand or what is in season. For example, try using:
– Dried apricots or raisins for a chewy sweetness.
– Pecans or hazelnuts for a rich, buttery flavor.
– Cranberries or blueberries for a tart twist.
Ideas for Adding Seeds or Coconut
Incorporating flaxseeds, chia seeds, or shredded coconut can boost the nutritional value even further. These additions provide omega-3 fatty acids, fiber, and a hint of tropical flavor that complements the other ingredients beautifully.
Seasonal Variations
As the seasons change, so can your snack bars. In the fall, try adding pumpkin puree and pumpkin spice to the mixture for a festive twist. In summer, consider mixing in tropical fruits like dried mango or pineapple for a refreshing taste that evokes sunny days.
Serving Suggestions
The Colorful Crunchy Back-to-School Snack Bars are versatile enough to be enjoyed in a variety of ways. Here are some creative ideas for serving these delicious treats:
Pairing Suggestions
To create a balanced and satisfying snack, pair the bars with fresh fruit, such as apple slices, banana halves, or a small bowl of berries. Alternatively, serve them alongside a dollop of yogurt for added protein and calcium. This combination not only makes for a nutritious snack but also adds variety and fun to your child’s eating routine.
Lunchbox Themes
These snack bars can also play a pivotal role in your child’s lunchbox. Create a fun lunchbox theme by pairing the bars with other homemade items, such as mini sandwiches, veggie sticks with hummus, or cheese cubes. This not only makes lunchtime exciting but also encourages kids to explore new tastes and textures.
Presentation Tips
Making snack time visually appealing can enhance the overall experience for children. Consider cutting the bars into fun shapes using cookie cutters or wrapping them in colorful parchment paper tied with twine. A little effort in presentation can make a big difference, turning an ordinary snack into a delightful treat.
Storage and Shelf Life
To maintain the freshness and quality of your Colorful Crunchy Snack Bars, proper storage is essential. Here are some best practices to follow:
Best Practices for Storing Snack Bars
– Room Temperature: If you plan to consume the snack bars within a week, store them in an airtight container at room temperature. This will keep them chewy and flavorful.
– Refrigeration: For longer shelf life, you can refrigerate the bars. They will stay fresh for up to two weeks when stored in an airtight container in the fridge.
Freezing for Meal Prep Convenience
If you want to prepare these bars in advance, freezing is an excellent option. Wrap each bar individually in plastic wrap or aluminum foil and place them in a freezer-safe bag. When you’re ready to enjoy one, simply remove it from the freezer and let it thaw at room temperature or pop it in the microwave for a few seconds. Frozen snack bars can last for up to three months, making them a convenient grab-and-go option.
Conclusion
The Colorful Crunchy Back-to-School Snack Bars are more than just a tasty treat; they are a wholesome and nutritious option that can easily be customized to suit your child’s preferences. By making these bars at home, you not only control the ingredients but also create an opportunity for your children to engage in the cooking process, fostering healthy eating habits from a young age.
Encourage your kids to experiment with the recipe—try different fruits, nuts, and spices to find their favorite combinations. Not only will they have fun creating their own unique bars, but they will also develop an appreciation for healthy foods and the benefits they bring to their energy levels throughout the school day.
In a world filled with processed snacks, these homemade bars stand out as a delicious, nutritious, and fun option that supports children’s growth and well-being. So gather your ingredients, roll up your sleeves, and enjoy the rewarding experience of making Colorful Crunchy Back-to-School Snack Bars together. Your children will thank you for it!